Easy Baked Chicken and Cheese Quesadillas: A Perfect Beginner-Friendly Recipe
There’s something incredibly satisfying about biting into a warm, crispy quesadilla filled with gooey, cheesy goodness and flavorful chicken. The best part? This recipe is incredibly simple, making it ideal for beginner cooks who want to prepare a delicious meal without spending hours in the kitchen.
PrintEasy Baked Chicken and Cheese Quesadillas: A Perfect Beginner-Friendly Recipe

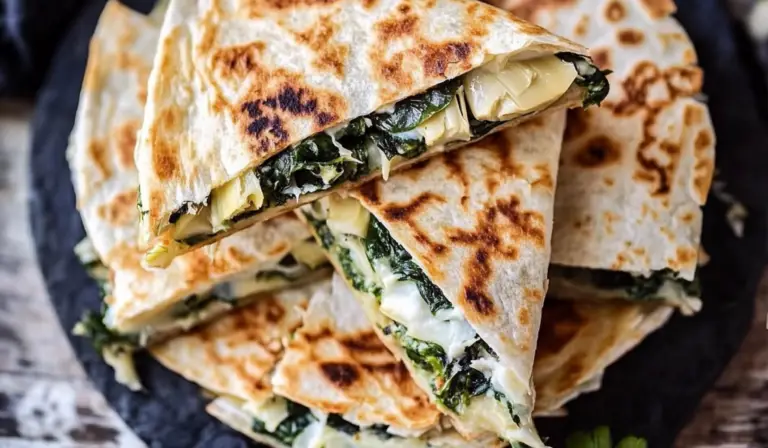
These Easy Baked Chicken and Cheese Quesadillas are golden, crispy, and loaded with melty cheese and tender, seasoned chicken. Baked instead of fried for less mess and more crunch, they’re the perfect easy meal or snack—just slice, dip, and enjoy! 🌮✨
- Prep Time: 10 minutes
- Cook Time: 20 minutes
- Total Time: 30 minutes
- Yield: 8 servings 1x
Ingredients
- ½ cup unsalted butter, melted
- 8 large flour tortillas
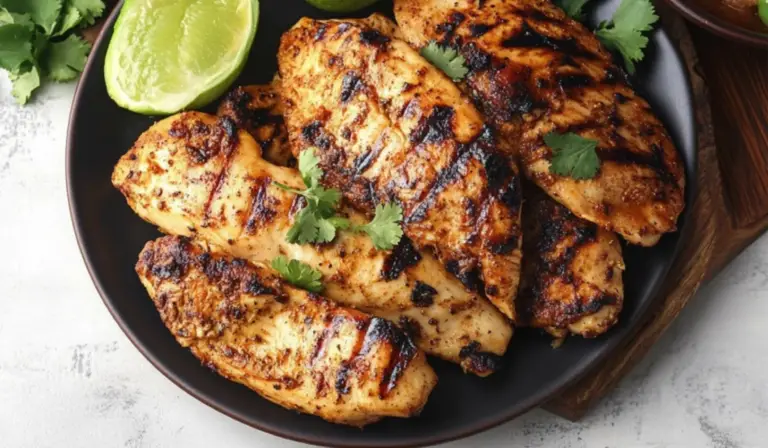
- 3 cups cooked chicken, shredded
- 1 cup sour cream
- 2 tablespoons taco seasoning
- 4 cups fiesta blend cheese, shredded
Instructions
Step 1: Preheat the Oven
Begin by preheating your oven to 400°F (200°C). This ensures the quesadillas bake evenly and develop a crisp, golden exterior.
Line a large baking sheet with parchment paper or a silicone baking mat. This prevents the tortillas from sticking and makes cleanup easier.
Step 2: Prepare the Baking Sheet
Melt the butter in a microwave-safe bowl. Using a brush, spread half of the melted butter over the parchment paper. This helps achieve a crisp, golden texture on the bottom of the quesadillas.
Step 3: Mix the Filling
In a large bowl, combine the shredded chicken, sour cream, taco seasoning, and 3 cups of shredded cheese. Mix until the ingredients are evenly coated. The sour cream adds a creamy texture, while the taco seasoning enhances the flavor with a blend of spices.
Step 4: Assemble the Quesadillas
Lay the tortillas flat on the prepared baking sheet. Scoop a portion of the chicken mixture onto one half of each tortilla. Sprinkle extra cheese on top of the filling for an extra cheesy texture.
Fold the tortillas over the filling, pressing them gently to ensure they stay closed.
Step 5: Brush with Butter
Brush the tops of the folded tortillas with the remaining melted butter. This helps them turn golden brown and crispy in the oven.
Step 6: Bake the Quesadillas
Place the baking sheet in the preheated oven. Bake for 10 minutes, then carefully flip each quesadilla using a spatula. Return them to the oven and bake for another 10 minutes or until the tortillas are golden brown and crisp.
Step 7: Serve and Enjoy
Once the quesadillas are baked to perfection, remove them from the oven and let them cool slightly before cutting them into halves or quarters. Serve them warm with your favorite dips or toppings.
Notes
How to Cook the Chicken
If you don’t have pre-cooked chicken, here are a few simple methods:
- Boiling: Place chicken breasts in a pot of water or broth, bring to a boil, and simmer for about 15-20 minutes until fully cooked. Shred the chicken using two forks.
- Baking: Bake chicken breasts at 375°F (190°C) for 25-30 minutes, then shred.
- Slow Cooker: Cook chicken in a slow cooker with some broth on low for 6-7 hours or on high for 3-4 hours, then shred.
- Rotisserie Chicken: For convenience, use store-bought rotisserie chicken and shred it.
Troubleshooting Common Issues
- Quesadillas are not crispy enough: Make sure to brush both sides with butter and bake long enough. If necessary, leave them in the oven for an extra 2-3 minutes.
- Cheese is not melting properly: Ensure the cheese is finely shredded for even melting. Also, avoid overfilling the tortillas, as this can prevent heat from distributing evenly.
- Filling is too dry: Add a little more sour cream or a splash of broth if the chicken mixture feels dry.
Efficiency Tips
- Pre-shred the chicken: Cook and shred the chicken in advance to cut down on prep time.
- Use a baking rack: If you want even crispier quesadillas, place them on a wire rack over the baking sheet so air circulates underneath.
- Make-ahead option: Assemble the quesadillas in advance, store them in the refrigerator, and bake when ready.
Baked quesadillas are a great alternative to the traditional stovetop method. Baking allows you to cook multiple quesadillas at once, ensuring even crispiness without the need for flipping each one individually in a pan. This method is not only more convenient but also produces consistently golden-brown, crunchy tortillas without excess oil.
This recipe is perfect for various occasions. Whether you need a quick and satisfying lunch, a simple dinner, or a crowd-pleasing snack for game day, these baked quesadillas deliver on flavor and texture. They require minimal ingredients, most of which you may already have in your kitchen, and they can be customized to suit different taste preferences.
For beginner cooks, this recipe provides a great introduction to basic cooking techniques such as seasoning, baking, and assembling a dish. It also offers flexibility, allowing you to experiment with different ingredients while still following a foolproof method for a delicious result.
Let’s get started with this easy and flavorful recipe.
Ingredients and Preparation
Ingredients
To make eight servings of baked chicken and cheese quesadillas, you will need:
- ½ cup unsalted butter, melted
- 8 large flour tortillas
- 3 cups cooked chicken, shredded
- 1 cup sour cream
- 2 tablespoons taco seasoning
- 4 cups fiesta blend cheese, shredded
Alternative Ingredients
This recipe is quite versatile, so feel free to make adjustments based on dietary needs or ingredient availability.
- Protein alternatives: Instead of chicken, you can use shredded beef, ground beef, or even black beans for a vegetarian version.
- Cheese variations: While fiesta blend cheese provides a great mix of flavors, you can substitute it with cheddar, Monterey Jack, pepper jack, or a Mexican cheese blend.
- Dairy-free options: If you’re lactose-intolerant or prefer a dairy-free option, swap out the cheese for a plant-based alternative and use dairy-free sour cream or avocado spread.
- Tortilla options: While flour tortillas work best for this baked method, whole wheat tortillas, gluten-free tortillas, or even low-carb tortillas can be used.
Step-by-Step Instructions
Step 1: Preheat the Oven
Begin by preheating your oven to 400°F (200°C). This ensures the quesadillas bake evenly and develop a crisp, golden exterior.
Line a large baking sheet with parchment paper or a silicone baking mat. This prevents the tortillas from sticking and makes cleanup easier.
Step 2: Prepare the Baking Sheet
Melt the butter in a microwave-safe bowl. Using a brush, spread half of the melted butter over the parchment paper. This helps achieve a crisp, golden texture on the bottom of the quesadillas.
Step 3: Mix the Filling
In a large bowl, combine the shredded chicken, sour cream, taco seasoning, and 3 cups of shredded cheese. Mix until the ingredients are evenly coated. The sour cream adds a creamy texture, while the taco seasoning enhances the flavor with a blend of spices.
Step 4: Assemble the Quesadillas
Lay the tortillas flat on the prepared baking sheet. Scoop a portion of the chicken mixture onto one half of each tortilla. Sprinkle extra cheese on top of the filling for an extra cheesy texture.
Fold the tortillas over the filling, pressing them gently to ensure they stay closed.
Step 5: Brush with Butter
Brush the tops of the folded tortillas with the remaining melted butter. This helps them turn golden brown and crispy in the oven.
Step 6: Bake the Quesadillas
Place the baking sheet in the preheated oven. Bake for 10 minutes, then carefully flip each quesadilla using a spatula. Return them to the oven and bake for another 10 minutes or until the tortillas are golden brown and crisp.
Step 7: Serve and Enjoy
Once the quesadillas are baked to perfection, remove them from the oven and let them cool slightly before cutting them into halves or quarters. Serve them warm with your favorite dips or toppings.
Beginner Tips and Notes
Cooking can sometimes come with unexpected challenges, but with a few tips, even a beginner can achieve perfect results.
How to Cook the Chicken
If you don’t have pre-cooked chicken, here are a few simple methods:
- Boiling: Place chicken breasts in a pot of water or broth, bring to a boil, and simmer for about 15-20 minutes until fully cooked. Shred the chicken using two forks.
- Baking: Bake chicken breasts at 375°F (190°C) for 25-30 minutes, then shred.
- Slow Cooker: Cook chicken in a slow cooker with some broth on low for 6-7 hours or on high for 3-4 hours, then shred.
- Rotisserie Chicken: For convenience, use store-bought rotisserie chicken and shred it.
Troubleshooting Common Issues
- Quesadillas are not crispy enough: Make sure to brush both sides with butter and bake long enough. If necessary, leave them in the oven for an extra 2-3 minutes.
- Cheese is not melting properly: Ensure the cheese is finely shredded for even melting. Also, avoid overfilling the tortillas, as this can prevent heat from distributing evenly.
- Filling is too dry: Add a little more sour cream or a splash of broth if the chicken mixture feels dry.
Efficiency Tips
- Pre-shred the chicken: Cook and shred the chicken in advance to cut down on prep time.
- Use a baking rack: If you want even crispier quesadillas, place them on a wire rack over the baking sheet so air circulates underneath.
- Make-ahead option: Assemble the quesadillas in advance, store them in the refrigerator, and bake when ready.

Serving Suggestions
These baked quesadillas are delicious on their own, but pairing them with complementary sides can enhance the meal.
Dipping Sauces
- Guacamole: A creamy avocado dip with lime juice and seasoning.
- Salsa: Fresh tomato salsa, pico de gallo, or a smoky roasted salsa.
- Sour Cream: Adds a cool, tangy contrast to the warm, cheesy quesadilla.
- Chipotle Mayo: A spicy and creamy dip for extra flavor.
Side Dishes
- Mexican Rice: A flavorful side that complements the seasonings in the quesadilla.
- Refried Beans: A protein-packed side that adds creaminess to the meal.
- Corn Salad: A refreshing side dish with corn, tomatoes, and lime dressing.
- Simple Green Salad: A light side with lettuce, cucumber, and a citrus vinaigrette.
Storage and Reheating Tips
If you have leftovers, store them properly to maintain freshness.
- Refrigeration: Place cooled quesadillas in an airtight container and store them in the refrigerator for up to three days.
- Freezing: Wrap individual quesadillas in plastic wrap and store them in a freezer-safe bag for up to two months.
- Reheating: For best results, reheat in an oven at 350°F (175°C) for 10 minutes or in a toaster oven. Avoid microwaving, as it can make the tortillas soggy.
Conclusion
Baked chicken and cheese quesadillas are a fantastic option for beginner cooks looking for a simple yet satisfying meal. The ease of preparation, minimal ingredients, and delicious results make this a go-to recipe for busy weeknights, casual gatherings, or quick lunches.
This recipe offers plenty of room for customization, whether through different proteins, cheese varieties, or spice levels. The baking method ensures consistent results with minimal effort, making it a stress-free cooking experience.
If you try this recipe, feel free to experiment with different flavors and toppings. Share your experience and any modifications you made in the comments. Cooking is all about creativity and enjoyment, so have fun in the kitchen and enjoy your homemade quesadillas.