How to Make Homemade Tortilla Chips: A Beginner’s Guide
There’s something incredibly satisfying about making homemade tortilla chips. The first time I tried it, I was surprised by how simple the process was—just a few ingredients, a little bit of frying, and within minutes, I had a batch of warm, crispy chips that tasted far better than any store-bought version. What made it even better was the ability to control the seasoning, oil quality, and freshness, ensuring a healthier, more flavorful snack.
PrintHow to Make Homemade Tortilla Chips: A Beginner’s Guide
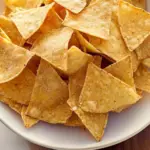
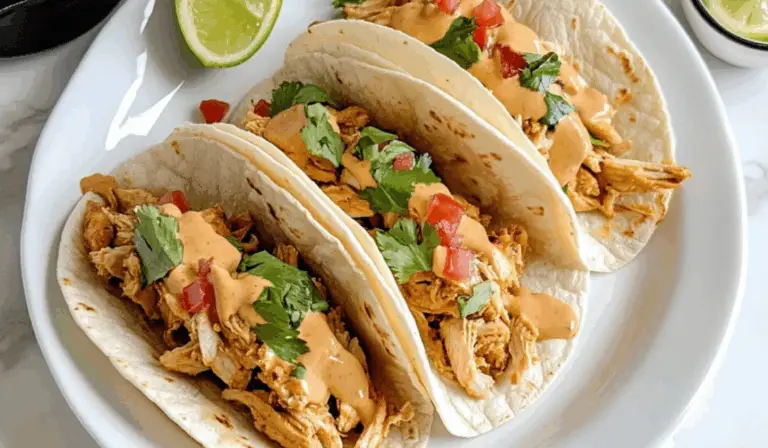
Why buy tortilla chips when you can make them fresh at home? 🌽✨ These Homemade Tortilla Chips are light, crispy, and incredibly easy to make—perfect for pairing with your favorite dips. Whether baked, fried, or air-fried, they bring that authentic crunch without the extra additives. Serve them warm with salsa, guacamole, or nachos, and watch them disappear! 🤤
#CrispyTortillaChips 🌽 #HomemadeHappiness ❤️ #SnackTimePerfection 😋 #EasyAndCrunchy 🔥 #DippingDoneRight 🥑 #QuickAndTasty 🚀 #SimpleIngredientsBigFlavor 🍽️ #FoodieFavorite 🎉 #PerfectPartySnack 👩🍳 #TacoTuesdayEssential 🌮
- Prep Time: 10 minutes
- Cook Time: 15 minutes
- Total Time: 25 minutes
- Yield: 4 servings 1x
Ingredients
- 1 ½ cups canola oil or vegetable oil (for frying)
- 12 corn tortillas
- Kosher salt (to taste)
Instructions
Step 1: Preparing the Tortillas
Stack the tortillas on a clean cutting board. Using a sharp knife or a pizza cutter, slice the stack into six equal wedges, just like a pizza. If you prefer smaller chips, you can cut them into eight wedges instead.
Step 2: Heating the Oil
Pour the oil into a large, heavy-bottomed pan, such as a cast iron skillet or a deep frying pan. Heat the oil over medium heat until it reaches 350°F. If you do not have a thermometer, you can test the oil by dropping a small piece of tortilla into it. If it starts sizzling immediately, the oil is ready. If it takes too long to bubble, allow it to heat for another minute before testing again.
Step 3: Frying the Tortilla Chips
Carefully place a few tortilla wedges into the hot oil, ensuring that you do not overcrowd the pan. Overcrowding can cause the chips to stick together and fry unevenly. Fry the tortillas for about 1 to 2 minutes on each side until they turn golden brown and crispy.
Step 4: Draining and Seasoning
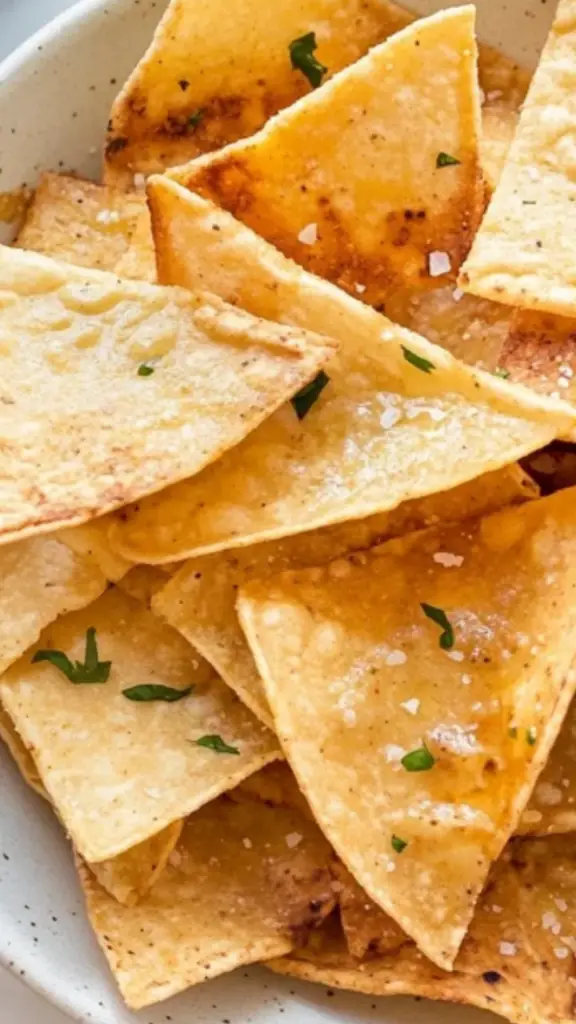
Using a slotted spoon or tongs, remove the chips from the oil and place them on a plate lined with paper towels. Immediately sprinkle kosher salt over the warm chips so that the seasoning sticks well. If you are using additional seasonings, now is the time to add them.
Step 5: Cooling and Serving
Allow the chips to cool for a minute or two before serving. This helps them achieve maximum crispiness. Once cooled, enjoy them with your favorite dips or as a side to a main dish.
Notes
How to Avoid Common Mistakes
- Overcrowding the Pan: Always fry in small batches to ensure even cooking. Overcrowding lowers the oil temperature and results in soggy chips.
- Oil Temperature: If the oil is too hot, the chips will burn quickly. If it is too cold, they will absorb excess oil and become greasy. Keeping the oil around 350°F is key.
- Timing: Watch the chips closely, as they can go from golden brown to burned in seconds. A light golden-brown color is the perfect indicator that they are done.
Efficient Kitchen Tips
- Batch Prep: If you plan to make chips frequently, pre-cut the tortillas and store them in an airtight container. This way, you can quickly fry them whenever needed.
- Draining the Right Way: While paper towels are commonly used to absorb excess oil, placing the chips on a wire rack over a baking sheet allows them to drain more evenly and stay crisp.
Storage Tips
Homemade tortilla chips are best enjoyed fresh, but if you have leftovers, store them in an airtight container at room temperature. To maintain crispiness, place a paper towel inside the container to absorb any moisture. Avoid refrigerating them, as humidity can make them soggy.
If the chips lose their crunch, reheat them in the oven at 300°F for 5-7 minutes until crispy again.
This recipe is perfect for beginner cooks because it requires only three ingredients and minimal effort while delivering impressive results. Whether you are looking for a quick snack, an appetizer for a gathering, or a complement to homemade dips like guacamole or salsa, these tortilla chips are a must-try.
Why This Recipe Works for Beginners
- Simplicity – Only three ingredients are needed, and the steps are straightforward.
- Time Efficiency – The entire process takes about 25 minutes, making it a quick recipe with immediate rewards.
- Customization – You can control the salt level, experiment with different seasonings, and even adjust the crispiness based on your preference.
- Healthier Alternative – Unlike many store-bought chips that contain preservatives and excessive sodium, these chips are made with fresh, simple ingredients.
Ingredients and Preparation
Ingredients
- 1 ½ cups canola oil or vegetable oil (for frying)
- 12 corn tortillas
- Kosher salt (to taste)
Alternative Ingredient Suggestions
- Oil: Instead of canola or vegetable oil, you can use avocado oil for a healthier option with a mild, buttery flavor. Olive oil can also be used, but it has a lower smoke point, so frying must be done carefully.
- Tortillas: While corn tortillas provide the most authentic and traditional taste, flour tortillas can be used for a slightly different texture and flavor. Whole wheat tortillas are another alternative for a healthier twist.
- Seasoning: Beyond kosher salt, try using smoked paprika, chili powder, garlic powder, or even a squeeze of lime juice for added flavor.
Step-by-Step Instructions
Step 1: Preparing the Tortillas
Stack the tortillas on a clean cutting board. Using a sharp knife or a pizza cutter, slice the stack into six equal wedges, just like a pizza. If you prefer smaller chips, you can cut them into eight wedges instead.
Step 2: Heating the Oil
Pour the oil into a large, heavy-bottomed pan, such as a cast iron skillet or a deep frying pan. Heat the oil over medium heat until it reaches 350°F. If you do not have a thermometer, you can test the oil by dropping a small piece of tortilla into it. If it starts sizzling immediately, the oil is ready. If it takes too long to bubble, allow it to heat for another minute before testing again.
Step 3: Frying the Tortilla Chips
Carefully place a few tortilla wedges into the hot oil, ensuring that you do not overcrowd the pan. Overcrowding can cause the chips to stick together and fry unevenly. Fry the tortillas for about 1 to 2 minutes on each side until they turn golden brown and crispy.
Step 4: Draining and Seasoning
Using a slotted spoon or tongs, remove the chips from the oil and place them on a plate lined with paper towels. Immediately sprinkle kosher salt over the warm chips so that the seasoning sticks well. If you are using additional seasonings, now is the time to add them.
Step 5: Cooling and Serving
Allow the chips to cool for a minute or two before serving. This helps them achieve maximum crispiness. Once cooled, enjoy them with your favorite dips or as a side to a main dish.
Beginner Tips and Notes
How to Avoid Common Mistakes
- Overcrowding the Pan: Always fry in small batches to ensure even cooking. Overcrowding lowers the oil temperature and results in soggy chips.
- Oil Temperature: If the oil is too hot, the chips will burn quickly. If it is too cold, they will absorb excess oil and become greasy. Keeping the oil around 350°F is key.
- Timing: Watch the chips closely, as they can go from golden brown to burned in seconds. A light golden-brown color is the perfect indicator that they are done.
Efficient Kitchen Tips
- Batch Prep: If you plan to make chips frequently, pre-cut the tortillas and store them in an airtight container. This way, you can quickly fry them whenever needed.
- Draining the Right Way: While paper towels are commonly used to absorb excess oil, placing the chips on a wire rack over a baking sheet allows them to drain more evenly and stay crisp.
Storage Tips
Homemade tortilla chips are best enjoyed fresh, but if you have leftovers, store them in an airtight container at room temperature. To maintain crispiness, place a paper towel inside the container to absorb any moisture. Avoid refrigerating them, as humidity can make them soggy.
If the chips lose their crunch, reheat them in the oven at 300°F for 5-7 minutes until crispy again.
Serving Suggestions
Pairing with Dips
These homemade tortilla chips pair well with a variety of dips and toppings, including:
- Guacamole: A creamy, flavorful contrast to the crispiness of the chips.
- Salsa: Whether it’s a classic tomato salsa, mango salsa, or a spicy version, fresh salsa is a perfect match.
- Queso Dip: A warm, cheesy dip that enhances the texture of the chips.
- Hummus: For a unique twist, try serving these chips with hummus instead of traditional pita chips.
Using Tortilla Chips in Other Dishes
Beyond snacking, tortilla chips can be incorporated into other meals:
- Nachos: Layer them with shredded chicken or beef, melted cheese, beans, and jalapeños for a delicious nacho platter.
- Chilaquiles: Sauté the chips with salsa and top them with eggs, chicken, or cheese for a classic Mexican breakfast dish.
- Soup Topping: Crush tortilla chips over a bowl of chicken tortilla soup for extra texture and crunch.
- Salad Garnish: Add broken chips to salads for a crispy element, similar to croutons.
Conclusion: Why You Should Try This Recipe Today
Homemade tortilla chips are one of the easiest and most rewarding snacks to make from scratch. With just three ingredients and a few simple steps, even a beginner can achieve crispy, flavorful chips that rival anything found in stores.
Making your own chips allows you to control the ingredients, avoid preservatives, and experiment with different flavors. Whether you enjoy them plain, seasoned with spices, or paired with a variety of dips, these chips are a versatile and delicious addition to any meal.
If you try this recipe, share your experience and any creative seasoning ideas. Cooking should be fun and customizable, so feel free to experiment and make these chips your own.