Loaded Chicken Chili Con Carne Nachos
There’s something undeniably comforting about a tray of loaded nachos fresh from the oven—crispy tortilla chips layered with savory chili, melted cheese, tangy onions, and a dollop of cool sour cream. It’s the kind of dish that disappears in minutes at parties, movie nights, or weekend gatherings. This upgraded take on chili con carne nachos uses seasoned ground chicken instead of the traditional beef or pork, creating a dish that’s just as rich and filling, but a bit lighter and easier on the stomach.

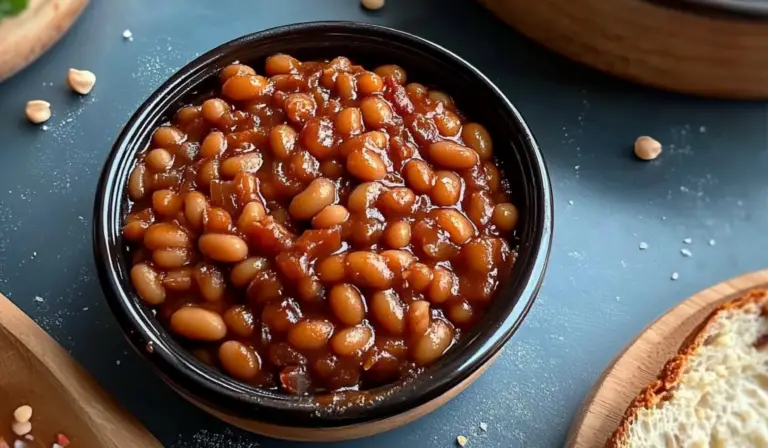
What makes these nachos stand out is the depth of flavor packed into the homemade chicken chili con carne. Made with a blend of warming spices, tomatoes, beans, and tender ground chicken, the chili is bold without being overpowering and comes together in under 30 minutes. Once the chili is spooned generously over sturdy tortilla chips, topped with cheese, and baked to bubbling perfection, all that’s left is to add your favorite fresh toppings and dig in.
This recipe also works well as a smart way to repurpose leftover chili into something brand new. Whether you’re preparing it from scratch or working with a pre-cooked batch, the final dish is guaranteed to impress and satisfy. Let’s walk through the ingredients, prep steps, and serving ideas to help you get the most out of this nacho experience.
Ingredients and Preparation
For the Chicken Chili Con Carne:
- 2 tablespoons olive oil
- 1 medium yellow onion, finely chopped
- 2 cloves garlic, minced
- 450 grams (1 lb) ground chicken
- 1 tablespoon tomato paste
- 1 teaspoon smoked paprika
- 1 teaspoon ground cumin
- ½ teaspoon chili powder (adjust to preference)
- 1 teaspoon dried oregano
- 1 teaspoon kosher salt
- ½ teaspoon black pepper
- 400 grams (14 oz) canned diced tomatoes
- 1 cup red kidney beans, drained and rinsed
- ½ cup water or low-sodium chicken broth
For the Nacho Assembly:
- 200 grams (7 oz) thick tortilla chips
- 1½ cups shredded cheddar cheese
- ½ cup shredded mozzarella (optional for extra meltiness)
- ½ red onion, diced
- ½ cup sour cream
- 2 tablespoons fresh cilantro, chopped
- Jalapeño slices (optional)
- Lime wedges (for serving)
- Guacamole or sliced avocado (optional)
Preparation Notes:
- Choose sturdy tortilla chips—they’ll hold up better under toppings and baking.
- Use freshly shredded cheese for better melting and flavor.
- You can make the chili a day ahead and refrigerate it until ready to use.
Step-by-Step Instructions
Step 1: Prepare the Chicken Chili Con Carne
- In a large skillet, heat olive oil over medium heat. Add chopped onion and cook for 3–4 minutes, stirring frequently, until the onion is soft and translucent.
- Stir in minced garlic and cook for another 30 seconds until fragrant.
- Add ground chicken and use a spoon or spatula to break it up as it cooks. Sauté for about 6–7 minutes until no pink remains and the chicken is lightly browned.
- Mix in tomato paste, paprika, cumin, chili powder, oregano, salt, and black pepper. Stir well to coat the chicken in the seasonings.
- Pour in the diced tomatoes and kidney beans, followed by water or broth. Stir everything together and bring to a gentle simmer.
- Reduce heat to low and let the mixture cook uncovered for 20–25 minutes, stirring occasionally. The chili should thicken slightly. If it becomes too thick, add a little more water.
- Taste and adjust seasonings as needed. Remove from heat and set aside to cool slightly before assembly.
Step 2: Assemble and Bake the Nachos
- Preheat your oven to 200°C (400°F). Line a large sheet pan with parchment paper or foil for easier cleanup.
- Spread tortilla chips in an even layer across the baking sheet, trying to avoid too much overlap.
- Spoon the chicken chili con carne over the chips, spreading it out so each chip gets some coverage.
- Sprinkle shredded cheddar (and mozzarella if using) generously over the top.
- Place the tray in the oven and bake for 10–12 minutes, or until the cheese is melted and bubbling.
- Remove from the oven and immediately top with diced red onion, spoonfuls of sour cream, chopped cilantro, and any additional toppings like jalapeño or avocado.
- Serve hot with lime wedges on the side.
Beginner Tips and Notes
- Brown the Chicken Properly: Allow the ground chicken to cook undisturbed for a few minutes before stirring to develop a flavorful sear.
- Spice Adjustments: Start with less chili powder if you’re spice-sensitive and add more to taste near the end.
- Thickening the Chili: If your chili feels too soupy, let it simmer uncovered a few minutes longer until reduced.
- Chip Selection Matters: Thin chips will break or turn soggy; opt for thick, restaurant-style tortilla chips for best results.
- Batch Cooking: Double the chili recipe and freeze half for quick nachos, rice bowls, or baked potatoes later in the week.
Loaded Chicken Chili Con Carne Nachos

Get ready for the ultimate snack attack with these Loaded Chicken Chili Con Carne Nachos! 🔥🌶️ Crunchy tortilla chips are piled high with hearty chicken chili, melty cheese, beans, and all your favorite toppings—think jalapeños, sour cream, guac, and more. 🍗🧀🥑 Every bite is bold, saucy, and bursting with Tex-Mex flavor. Perfect for parties, game day, or a fun dinner idea—these nachos are messy, meaty, and totally irresistible! 🎉🌮
- Prep Time: 15 minutes
- Cook Time: 30 minutes
- Total Time: 45 minutes
- Yield: 4–6 servings 1x
Ingredients
For the Chicken Chili Con Carne:
-
2 tablespoons olive oil
-
1 medium yellow onion, finely chopped
-
2 cloves garlic, minced
-
450 grams (1 lb) ground chicken
-
1 tablespoon tomato paste
-
1 teaspoon smoked paprika
-
1 teaspoon ground cumin
-
½ teaspoon chili powder (adjust to preference)
-
1 teaspoon dried oregano
-
1 teaspoon kosher salt
-
½ teaspoon black pepper
-
400 grams (14 oz) canned diced tomatoes
-
1 cup red kidney beans, drained and rinsed
-
½ cup water or low-sodium chicken broth
For the Nacho Assembly:
-
200 grams (7 oz) thick tortilla chips
-
1½ cups shredded cheddar cheese
-
½ cup shredded mozzarella (optional for extra meltiness)
-
½ red onion, diced
-
½ cup sour cream
-
2 tablespoons fresh cilantro, chopped
-
Jalapeño slices (optional)
-
Lime wedges (for serving)
-
Guacamole or sliced avocado (optional)
Preparation Notes:
-
Choose sturdy tortilla chips—they’ll hold up better under toppings and baking.
-
Use freshly shredded cheese for better melting and flavor.
-
You can make the chili a day ahead and refrigerate it until ready to use.
Instructions
Step 1: Prepare the Chicken Chili Con Carne
-
In a large skillet, heat olive oil over medium heat. Add chopped onion and cook for 3–4 minutes, stirring frequently, until the onion is soft and translucent.
-
Stir in minced garlic and cook for another 30 seconds until fragrant.
-
Add ground chicken and use a spoon or spatula to break it up as it cooks. Sauté for about 6–7 minutes until no pink remains and the chicken is lightly browned.
-
Mix in tomato paste, paprika, cumin, chili powder, oregano, salt, and black pepper. Stir well to coat the chicken in the seasonings.
-
Pour in the diced tomatoes and kidney beans, followed by water or broth. Stir everything together and bring to a gentle simmer.
-
Reduce heat to low and let the mixture cook uncovered for 20–25 minutes, stirring occasionally. The chili should thicken slightly. If it becomes too thick, add a little more water.
-
Taste and adjust seasonings as needed. Remove from heat and set aside to cool slightly before assembly.
Step 2: Assemble and Bake the Nachos
-
Preheat your oven to 200°C (400°F). Line a large sheet pan with parchment paper or foil for easier cleanup.
-
Spread tortilla chips in an even layer across the baking sheet, trying to avoid too much overlap.
-
Spoon the chicken chili con carne over the chips, spreading it out so each chip gets some coverage.
-
Sprinkle shredded cheddar (and mozzarella if using) generously over the top.
-
Place the tray in the oven and bake for 10–12 minutes, or until the cheese is melted and bubbling.
-
Remove from the oven and immediately top with diced red onion, spoonfuls of sour cream, chopped cilantro, and any additional toppings like jalapeño or avocado.
-
Serve hot with lime wedges on the side.
Notes
- Brown the Chicken Properly: Allow the ground chicken to cook undisturbed for a few minutes before stirring to develop a flavorful sear.
- Spice Adjustments: Start with less chili powder if you’re spice-sensitive and add more to taste near the end.
- Thickening the Chili: If your chili feels too soupy, let it simmer uncovered a few minutes longer until reduced.
- Chip Selection Matters: Thin chips will break or turn soggy; opt for thick, restaurant-style tortilla chips for best results.
- Batch Cooking: Double the chili recipe and freeze half for quick nachos, rice bowls, or baked potatoes later in the week.
Serving Suggestions
These nachos are ideal as a main dish or a party-style appetizer. Here are a few serving ideas to complete the experience:
- As a Main Meal: Serve with a fresh salad tossed in lime vinaigrette or a simple corn and black bean salad for balance.
- For a Party: Keep extra toppings on the side—like extra cheese, sour cream, salsa, and guacamole—so guests can customize.
- Family Style: Bake nachos in a cast iron skillet or baking dish for a rustic presentation right on the table.
- Add a Dip Station: Include salsa verde, chipotle mayo, or creamy yogurt dip as sides.
- Serve with a Drink: Pair with sparkling water, fruit spritzers, or a refreshing glass of iced tea to tame the spice.
You can even transform leftovers into a next-day meal. Reheat in the oven at 180°C (350°F) for about 10 minutes, and top with a fresh egg for a quick brunch-style dish.
Final Thought
These Loaded Chicken Chili Con Carne Nachos are more than just a casual snack—they’re a full-flavored, deeply satisfying dish that’s perfect for sharing. With their rich, homemade chili base and customizable toppings, they combine comfort, texture, and spice in every bite. Whether you’re cooking for a crowd, looking to spice up a weeknight meal, or turning leftovers into something exciting, this recipe is endlessly adaptable.
Thanks to the use of ground chicken and a straightforward cooking method, even beginners can achieve a result that looks and tastes impressive. The real secret lies in layering good ingredients thoughtfully—making sure each chip delivers a little bit of everything.