Mexican Shredded Beef: A Flavorful and Beginner-Friendly Recipe
Mexican shredded beef is one of those dishes that instantly becomes a household favorite. It is simple to make, incredibly flavorful, and perfect for a variety of meals, from tacos and burritos to rice bowls and salads. The best part about this recipe is that it requires minimal hands-on time while delivering maximum flavor.
PrintMexican Shredded Beef: A Flavorful and Beginner-Friendly Recipe

This Mexican Shredded Beef is slow-cooked to perfection, infused with bold spices, and effortlessly falls apart for the ultimate taco, burrito, or bowl filling. Juicy, savory, and packed with authentic flavors, this beginner-friendly recipe is a must-try! 🌶️🥩🧄
- Prep Time: 15 minutes
- Cook Time: 2 hours
- Total Time: 2 hours 15 minutes
- Yield: 24 servings (2-3 tacos per person) 1x
Ingredients
- 3 1/2 lbs chuck roast
- 1 tablespoon salt
- 1 tablespoon cumin
- 1 tablespoon chili powder
- 1 teaspoon oregano
- 1 teaspoon coriander
- 1 1/2 teaspoons garlic powder
- 1 1/2 teaspoons onion powder
- 1 1/2 teaspoons paprika
- 1 cup beef broth
- 1 tablespoon beef bouillon
- 3/4 cup green chile salsa
- 3/4 cup hot or mild salsa
- 1/2 teaspoon liquid smoke (optional, use up to 2 teaspoons for a stronger smoky flavor)
- 2 tablespoons olive oil (vegetable or canola oil also works)
- 1/4 cup brown sugar
Instructions
Step 1: Season the Beef
In a small bowl, mix the salt, cumin, chili powder, oregano, coriander, garlic powder, onion powder, and paprika. Sprinkle the seasoning mixture evenly over both sides of the beef, pressing it in so it adheres well. This step ensures that the beef is packed with flavor from the very beginning.
Step 2: Sear the Meat
Heat 2 tablespoons of olive oil in a large, heavy-bottomed pot over high heat. Once the oil is hot, add the beef and sear it well on all sides. This step is important because browning the meat enhances the depth of flavor. Once seared, remove the beef and transfer it to the Instant Pot or slow cooker.
Step 3: Prepare the Cooking Liquid
In the same pot, add the beef broth, beef bouillon, green chile salsa, hot or mild salsa, liquid smoke (if using), and brown sugar. Stir to combine, scraping up any browned bits from the bottom of the pot. These browned bits are packed with flavor and will enrich the broth.
Step 4: Cook the Beef
Place the beef back into the pot, turning it a few times to coat it evenly with the sauce.
- For Instant Pot: Secure the lid, ensuring the valve is set to “sealing.” Set the Pressure Cook or Manual mode for 90 minutes. After the cooking time is up, let the pressure naturally release for 15 to 20 minutes before opening the lid.
- For Slow Cooker: Cook on low for 8 to 10 hours or on high for 5 to 6 hours. The beef should be fork-tender and easy to shred.
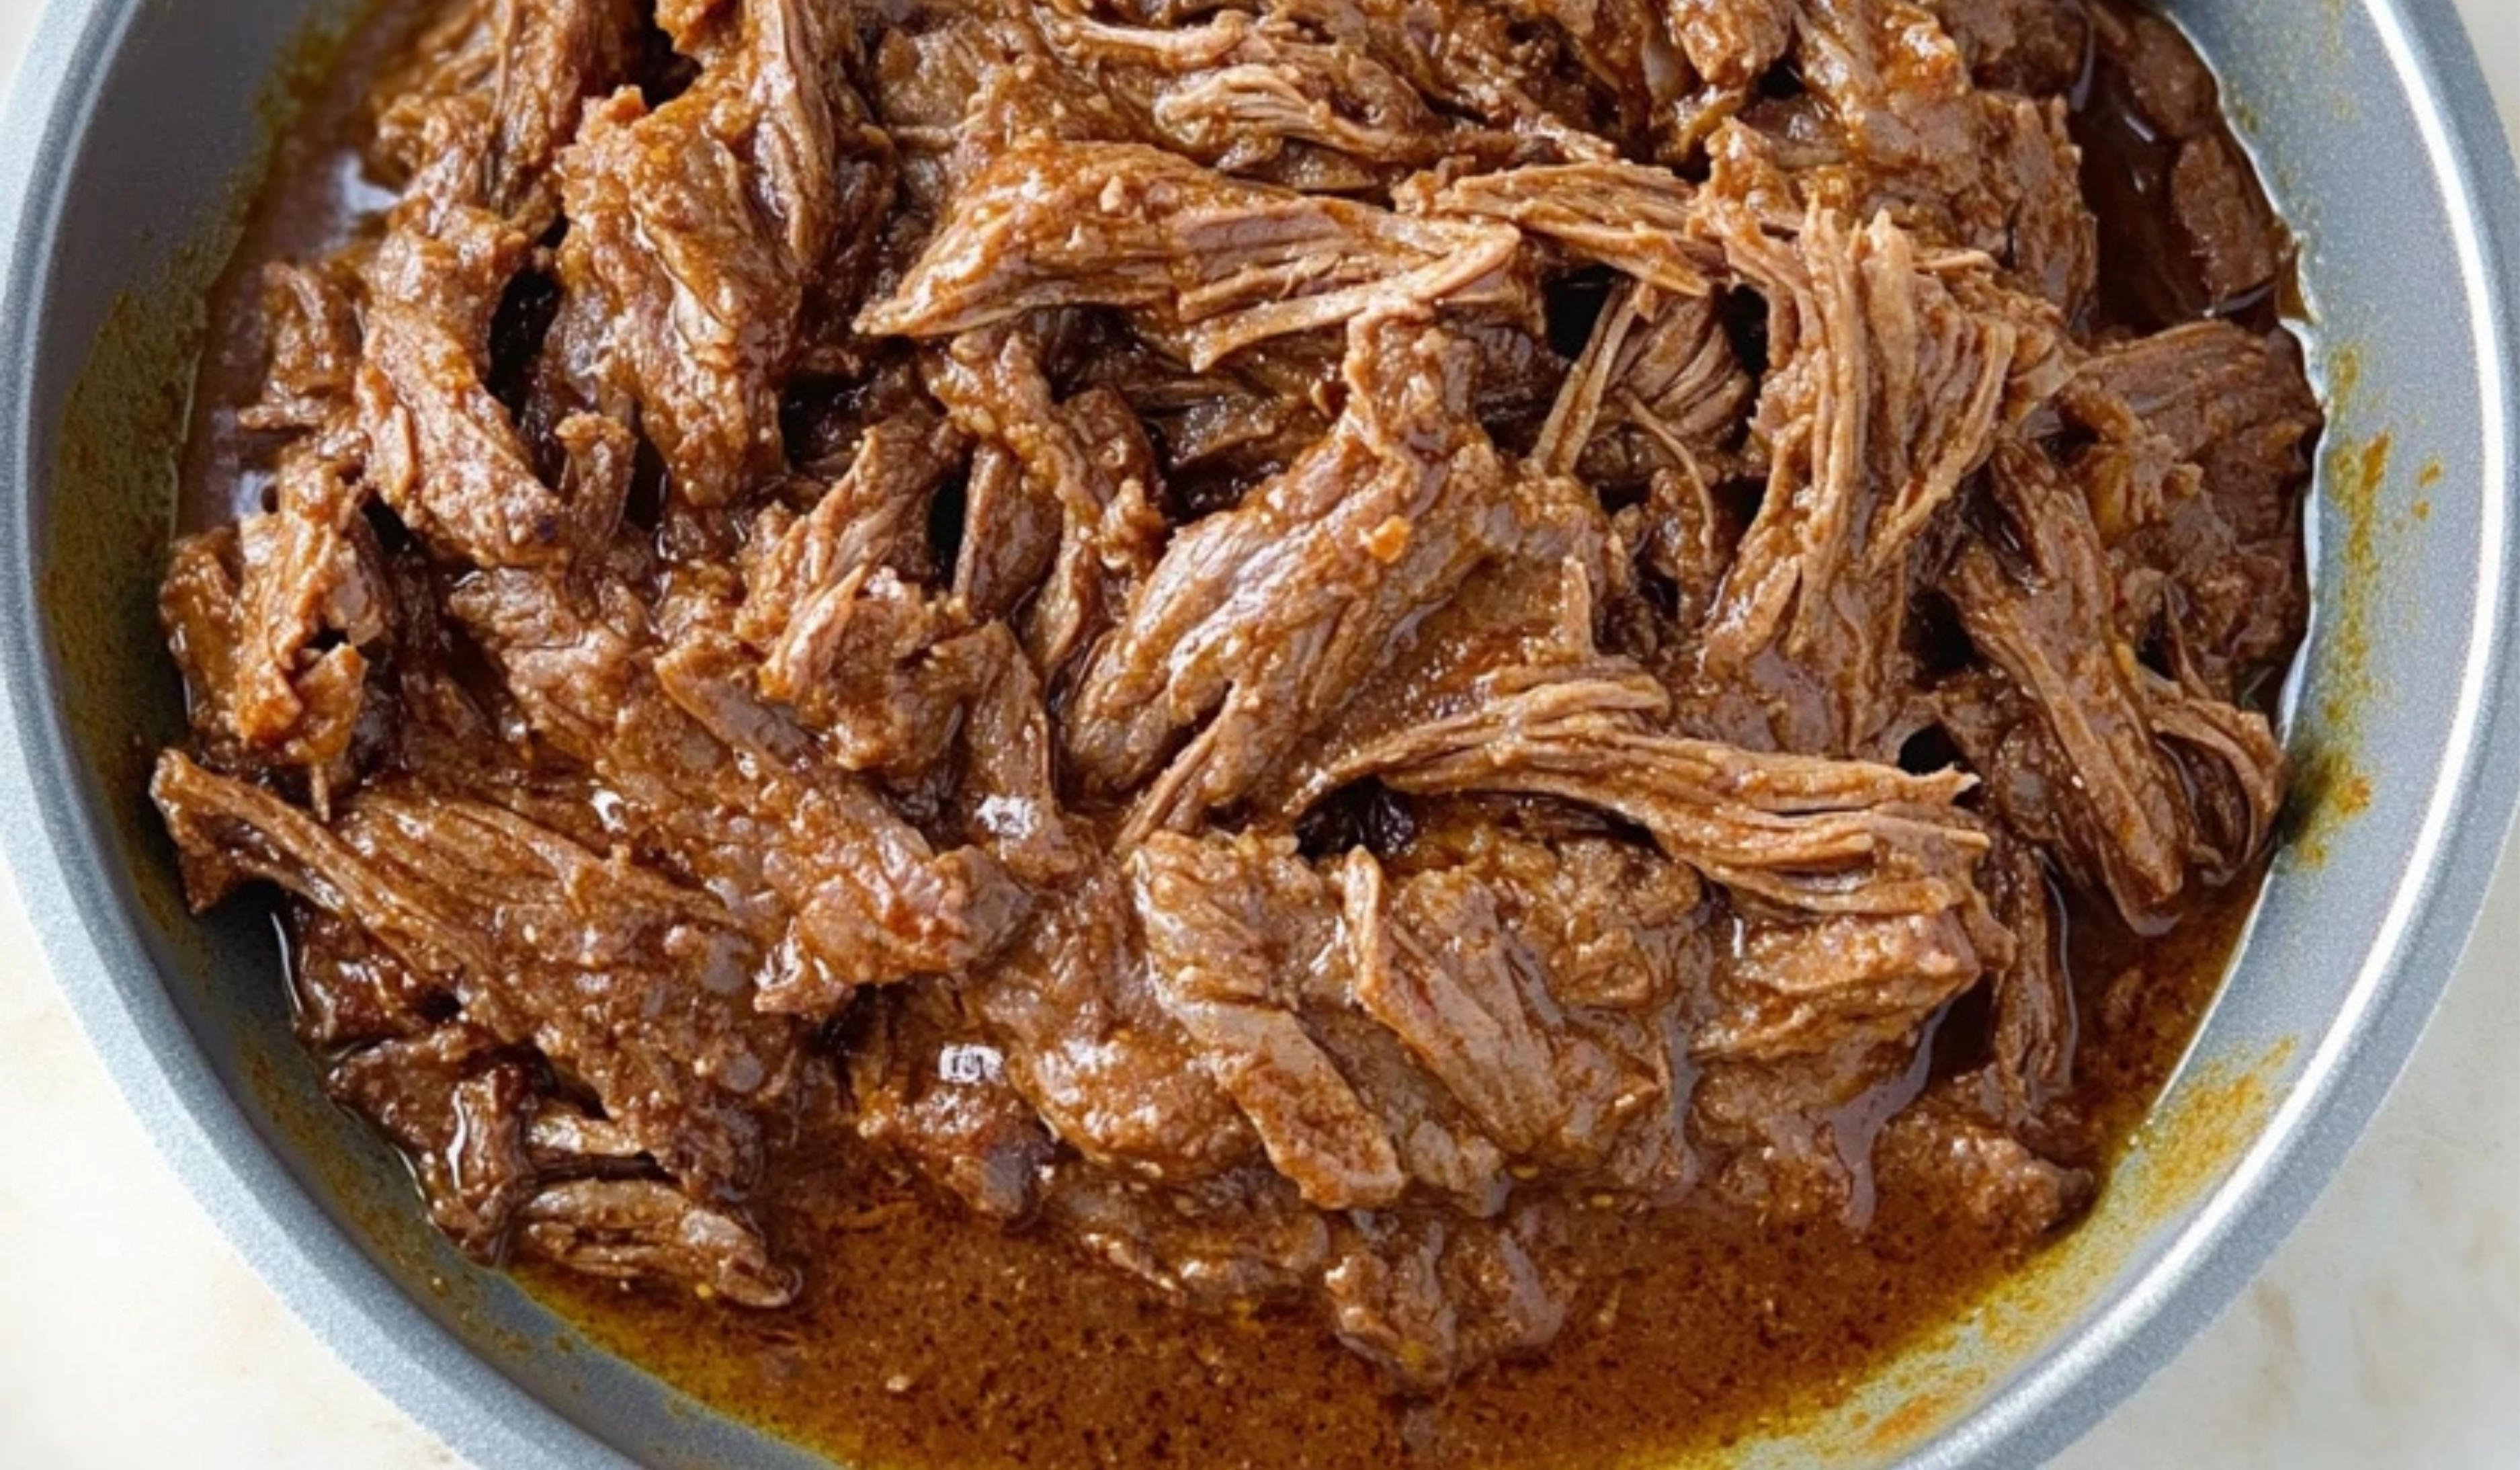
Step 5: Shred the Beef
Transfer the cooked beef to a large bowl or plate. Using two forks, shred the meat into bite-sized pieces. The meat should be so tender that it falls apart easily.
Step 6: Reduce the Sauce
Turn the Instant Pot to sauté mode or set the stove to medium heat. Bring the remaining liquid to a simmer and cook for 5 to 8 minutes, stirring occasionally, until it thickens slightly. This step intensifies the flavor of the sauce.
Step 7: Combine and Serve
Return the shredded beef to the pot and toss it in the sauce to ensure it is well coated. Let it absorb the flavors for a few minutes before serving.
Notes
- How to Tell if the Beef is Done: The beef should be fork-tender and easy to shred. If it feels tough, let it cook a bit longer.
- Avoid Overcrowding the Pan: When searing the beef, avoid overcrowding the pot. If necessary, sear in batches to get an even crust.
- Make-Ahead Tip: This beef tastes even better the next day as the flavors continue to develop. It can be made in advance and stored in an airtight container in the refrigerator.
- How to Fix Overly Spicy Beef: If the beef turns out too spicy, adding a bit of sour cream or cheese when serving can help balance the heat. A squeeze of lime juice can also mellow out the spice.
- Freezing for Later: This shredded beef freezes well. Store in airtight containers or freezer bags for up to three months. Thaw overnight in the refrigerator and reheat on the stovetop or in the microwave.
For beginners in the kitchen, this dish is an excellent way to build confidence. It does not require advanced cooking skills, just a few basic techniques like browning meat and using a pressure cooker or slow cooker. The ingredients are straightforward, and the result is a tender, juicy beef that practically melts in your mouth. With the right seasonings and a bit of patience, you can create a restaurant-quality dish at home.
What makes this recipe stand out is its versatility. It can be adjusted to suit different spice preferences, used in multiple dishes, and stored easily for meal prep. Whether cooking for a family dinner, a gathering with friends, or just preparing meals for the week, this shredded beef is a go-to option that never disappoints.
Ingredients and Preparation
The key to great Mexican shredded beef lies in a well-balanced combination of spices, broth, and slow cooking. Each ingredient plays an important role in building layers of flavor.
Ingredients
- 3 1/2 lbs chuck roast
- 1 tablespoon salt
- 1 tablespoon cumin
- 1 tablespoon chili powder
- 1 teaspoon oregano
- 1 teaspoon coriander
- 1 1/2 teaspoons garlic powder
- 1 1/2 teaspoons onion powder
- 1 1/2 teaspoons paprika
- 1 cup beef broth
- 1 tablespoon beef bouillon
- 3/4 cup green chile salsa
- 3/4 cup hot or mild salsa
- 1/2 teaspoon liquid smoke (optional, use up to 2 teaspoons for a stronger smoky flavor)
- 2 tablespoons olive oil (vegetable or canola oil also works)
- 1/4 cup brown sugar
Ingredient Substitutions and Variations
- If chuck roast is unavailable, brisket or beef shoulder can be used. These cuts have enough fat to stay tender during slow cooking.
- For a milder version, reduce the chili powder or use a mild salsa instead of a spicy one.
- For a smoky depth of flavor without liquid smoke, add a teaspoon of smoked paprika.
- If green chile salsa is hard to find, substitute with canned diced green chilies mixed with a bit of regular salsa.
- To make this dish even leaner, try using skinless, boneless chicken thighs instead of beef. The cooking time may need to be reduced slightly.
Step-by-Step Instructions
Step 1: Season the Beef
In a small bowl, mix the salt, cumin, chili powder, oregano, coriander, garlic powder, onion powder, and paprika. Sprinkle the seasoning mixture evenly over both sides of the beef, pressing it in so it adheres well. This step ensures that the beef is packed with flavor from the very beginning.
Step 2: Sear the Meat
Heat 2 tablespoons of olive oil in a large, heavy-bottomed pot over high heat. Once the oil is hot, add the beef and sear it well on all sides. This step is important because browning the meat enhances the depth of flavor. Once seared, remove the beef and transfer it to the Instant Pot or slow cooker.
Step 3: Prepare the Cooking Liquid
In the same pot, add the beef broth, beef bouillon, green chile salsa, hot or mild salsa, liquid smoke (if using), and brown sugar. Stir to combine, scraping up any browned bits from the bottom of the pot. These browned bits are packed with flavor and will enrich the broth.
Step 4: Cook the Beef
Place the beef back into the pot, turning it a few times to coat it evenly with the sauce.
- For Instant Pot: Secure the lid, ensuring the valve is set to “sealing.” Set the Pressure Cook or Manual mode for 90 minutes. After the cooking time is up, let the pressure naturally release for 15 to 20 minutes before opening the lid.
- For Slow Cooker: Cook on low for 8 to 10 hours or on high for 5 to 6 hours. The beef should be fork-tender and easy to shred.
Step 5: Shred the Beef
Transfer the cooked beef to a large bowl or plate. Using two forks, shred the meat into bite-sized pieces. The meat should be so tender that it falls apart easily.
Step 6: Reduce the Sauce
Turn the Instant Pot to sauté mode or set the stove to medium heat. Bring the remaining liquid to a simmer and cook for 5 to 8 minutes, stirring occasionally, until it thickens slightly. This step intensifies the flavor of the sauce.
Step 7: Combine and Serve
Return the shredded beef to the pot and toss it in the sauce to ensure it is well coated. Let it absorb the flavors for a few minutes before serving.
Beginner Tips and Notes
- How to Tell if the Beef is Done: The beef should be fork-tender and easy to shred. If it feels tough, let it cook a bit longer.
- Avoid Overcrowding the Pan: When searing the beef, avoid overcrowding the pot. If necessary, sear in batches to get an even crust.
- Make-Ahead Tip: This beef tastes even better the next day as the flavors continue to develop. It can be made in advance and stored in an airtight container in the refrigerator.
- How to Fix Overly Spicy Beef: If the beef turns out too spicy, adding a bit of sour cream or cheese when serving can help balance the heat. A squeeze of lime juice can also mellow out the spice.
- Freezing for Later: This shredded beef freezes well. Store in airtight containers or freezer bags for up to three months. Thaw overnight in the refrigerator and reheat on the stovetop or in the microwave.
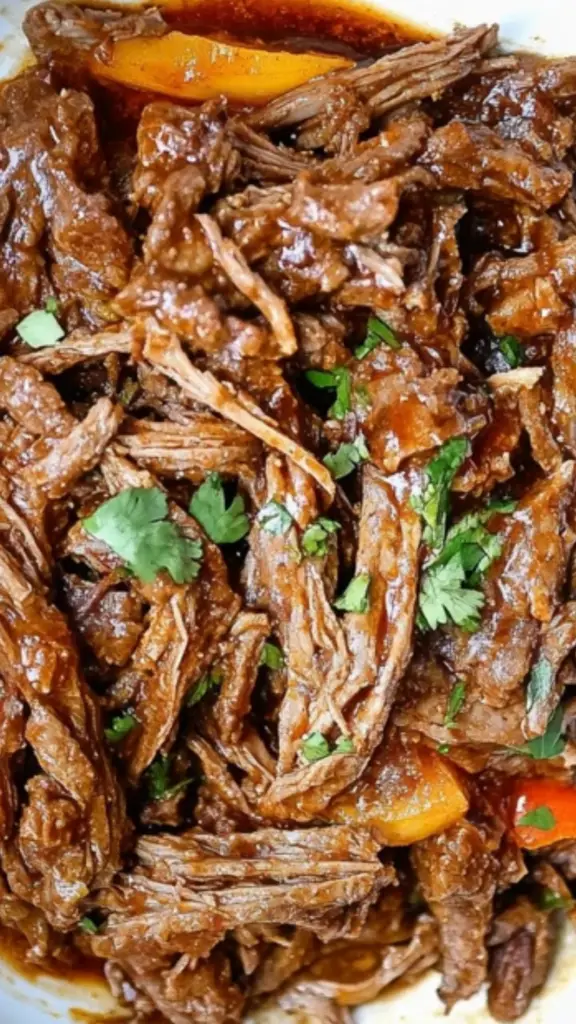
Serving Suggestions
- Tacos: Serve in warm corn or flour tortillas with toppings like diced onions, fresh cilantro, avocado, and crumbled queso fresco.
- Burritos: Wrap the shredded beef in a large tortilla with rice, beans, cheese, and salsa for a hearty meal.
- Rice Bowls: Serve over cilantro-lime rice with black beans, grilled vegetables, and a drizzle of lime crema.
- Salads: Use the beef as a protein option for a taco salad with lettuce, tomatoes, shredded cheese, and tortilla strips.
- Sandwiches: Pile the beef onto a toasted roll and top with melted cheese for a Mexican-style shredded beef sandwich.
- Nachos: Scatter the beef over tortilla chips with melted cheese, jalapeños, and guacamole.
Engagement Features
This Mexican shredded beef recipe is one that you will want to make again and again. It is packed with flavor, simple to prepare, and incredibly versatile. Whether making tacos for a casual dinner or meal prepping for the week, this dish delivers every time.
If you try this recipe, share your experience in the comments. What toppings did you use? Did you make any substitutions? Cooking is all about experimenting and finding what works best for you. Let’s create a space where beginner cooks can feel confident in the kitchen and enjoy the process of making delicious, home-cooked meals.