Nasi Goreng: A Simple and Flavorful Indonesian Fried Rice for Beginners
There’s something deeply comforting about a dish that transforms humble leftovers into a meal bursting with flavor. Nasi goreng, Indonesia’s beloved fried rice, is one such dish. Whether you’ve encountered it at a bustling street food stall or in the cozy comfort of a home kitchen, nasi goreng’s irresistible combination of savory, sweet, and smoky flavors makes it a standout favorite.
PrintNasi Goreng: A Simple and Flavorful Indonesian Fried Rice for Beginners

Nasi Goreng isn’t just fried rice—it’s a burst of Indonesian flavors in every bite! This easy-to-follow recipe helps beginners create the perfect balance of sweet, savory, and smoky tastes with just a handful of ingredients. Whether you enjoy it with chicken, shrimp, or a runny fried egg on top, this dish delivers restaurant-quality flavors straight from your kitchen. Ready to take your fried rice game to the next level? 🍳🔥🍚
#IndonesianClassic 🇮🇩 #FlavorExplosion 🌶️ #FriedRiceMagic 🍚 #QuickAndEasyMeals 👩🍳 #SavoryDelights 🍽️ #HomemadeGoodness ❤️ #SpicyAndSmoky 🔥 #ComfortBites 😋 #FoodieHeaven 🤤 #TastesLikeTravel 🌍
- Prep Time: 10 minutes
- Cook Time: 10 minutes
- Total Time: 20 minutes
- Yield: 2 servings 1x
Ingredients
- 2 cups cooked rice (preferably leftover rice, refrigerated overnight for better texture)
- 2 tbsp cooking oil (vegetable, canola, or peanut oil)
- 2 cloves garlic, minced
- 1 small onion, finely chopped
- 1 red chili, sliced (optional, for spice)
- ½ cup mixed vegetables (carrots, peas, bell peppers, or cabbage)
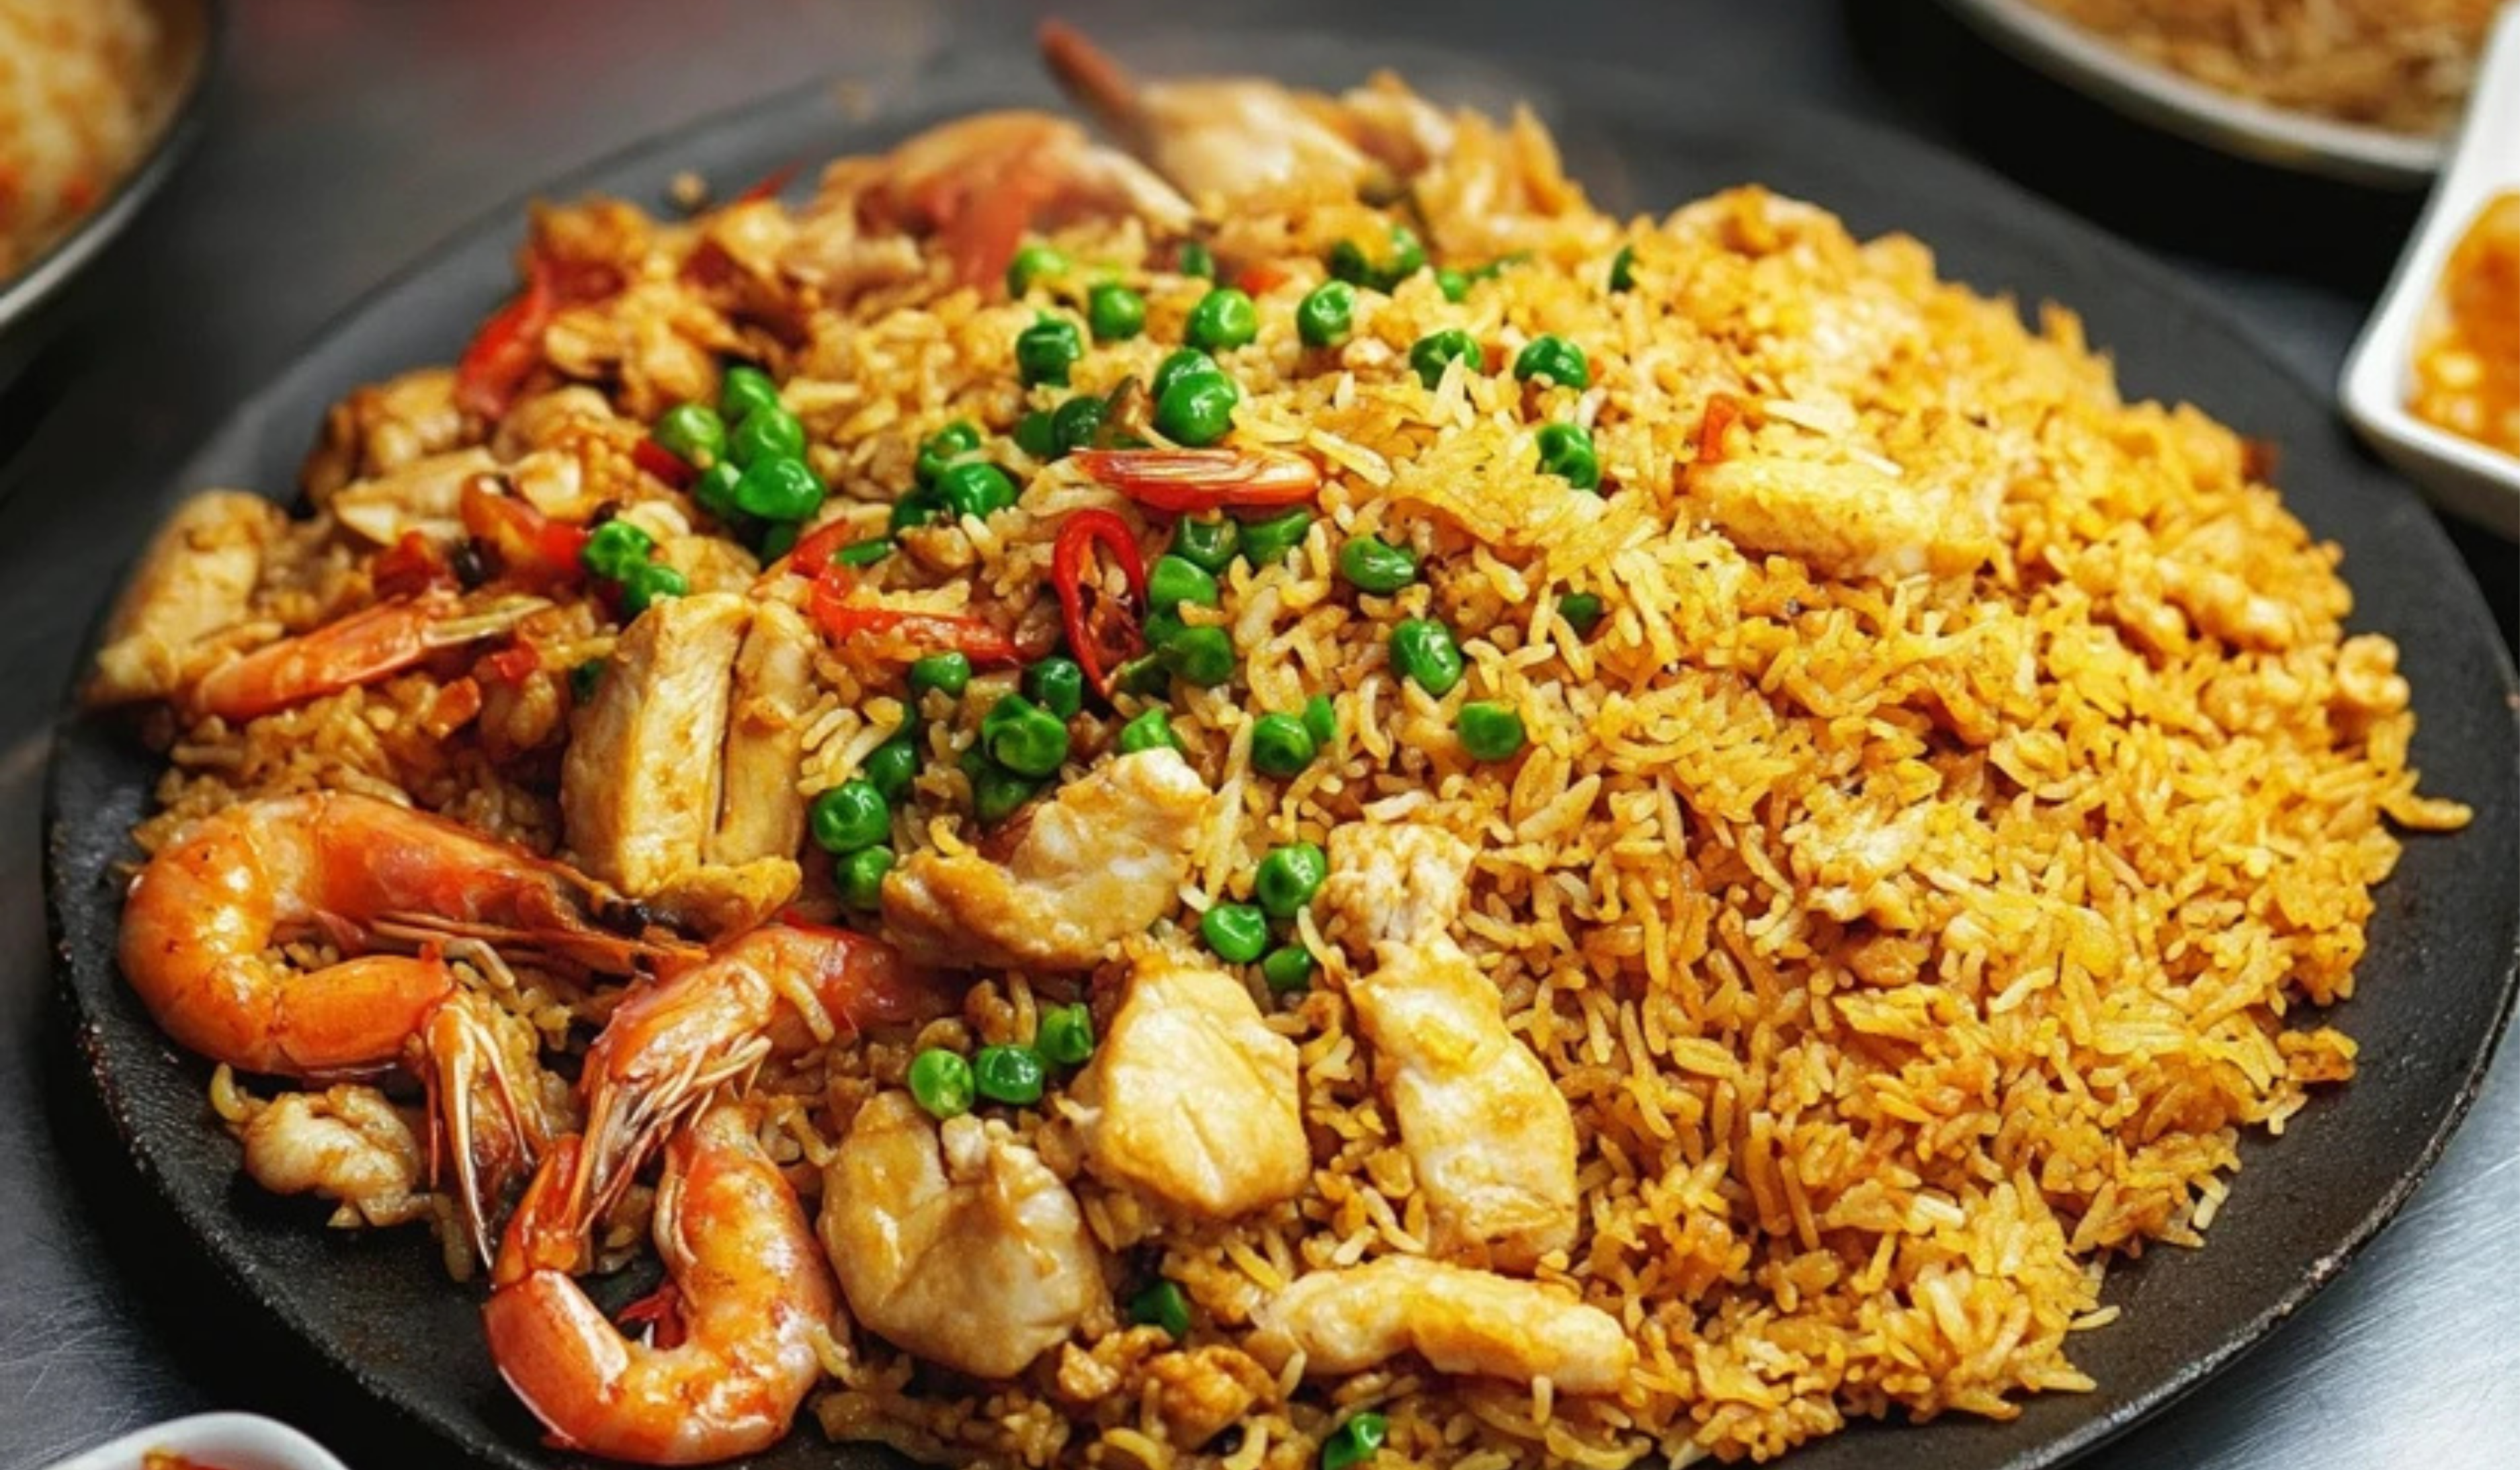
- ½ cup protein of choice (chicken, shrimp, tofu, or tempeh)
- 1 tbsp sweet soy sauce (kecap manis)
- 1 tbsp soy sauce
- ½ tsp salt (or to taste)
- ½ tsp black pepper
- 1 tsp shrimp paste or fish sauce (optional, for an authentic umami boost)
- 1 fried egg (for serving)
Instructions
Step 1: Prepare Your Ingredients
Before you start cooking, gather all your ingredients and have them ready to go. Since stir-frying happens quickly, it’s important to have everything prepped in advance. Chop your vegetables, mince the garlic, slice the chili, and set aside your proteins.
Tip: If using fresh rice, spread it out on a plate and let it cool for at least 30 minutes to prevent it from becoming mushy.
Step 2: Heat the Oil and Sauté the Aromatics
- Heat 2 tablespoons of oil in a large wok or skillet over medium-high heat.
- Add the minced garlic, chopped onion, and sliced chili. Stir-fry for about 30 seconds until fragrant.
Beginner’s Note: Be careful not to burn the garlic—it should turn golden, not brown. Stir continuously for even cooking.
Step 3: Cook the Protein and Vegetables
- Add your protein of choice (chicken, shrimp, tofu, or tempeh) to the pan. Stir-fry until fully cooked.
- Toss in the mixed vegetables and continue stirring for another 2 minutes.
Tip: If using shrimp, cook it until it turns pink. If using tofu, let it crisp up slightly for a better texture.
Step 4: Add the Rice and Seasonings
- Add the cold, cooked rice to the wok, breaking up any clumps with a spatula.
- Pour in the sweet soy sauce, regular soy sauce, salt, black pepper, and shrimp paste (if using).
- Stir everything together until the rice is evenly coated and heated through.
Beginner’s Note: Use a folding motion to mix the rice rather than pressing it down. This keeps the grains separate and prevents a sticky texture.
Step 5: Fry the Egg and Serve
- In a separate pan, heat a little oil and fry an egg to your desired doneness (crispy edges are ideal).
- Serve the nasi goreng on a plate, topped with the fried egg and garnished with fried shallots, cucumber slices, and lime wedges.
Notes
1. How to Avoid Soggy Rice
The secret to perfect fried rice is using day-old rice. Freshly cooked rice tends to be too moist and sticky, resulting in a mushy texture. If you only have fresh rice, spread it out on a tray and let it cool for at least 30 minutes before using it.
2. Adjusting the Spice Level
If you’re not a fan of spicy food, you can skip the red chili or replace it with bell peppers for a milder flavor. If you love heat, consider adding sambal oelek or extra chili slices.
3. What to Do If Your Rice Sticks to the Pan
If your rice starts sticking, lower the heat slightly and add a little more oil. Stir constantly to prevent burning.
4. How to Make Nasi Goreng Without a Wok
No wok? No problem! Use a large nonstick skillet to get similar results. A heavy-bottomed pan helps distribute heat evenly.
5. Can You Make Nasi Goreng Without Oil?
If you’re looking for a lower-fat version, use a nonstick pan and a small amount of water to stir-fry the ingredients. However, traditional nasi goreng relies on oil to develop its signature texture and flavor.
I still remember my first attempt at making nasi goreng. I was a beginner cook, hesitant about handling a hot wok and unsure about how to balance the seasonings. But as I worked through the steps—stirring the rice, adding the fragrant spices, and finally topping it with a crispy fried egg—I realized that nasi goreng is one of the most forgiving, customizable, and satisfying dishes out there.
This dish is perfect for beginners because it requires minimal ingredients, is quick to prepare, and offers endless variations. Plus, it’s an excellent way to use up leftover rice and whatever vegetables or proteins you have in your fridge. In this guide, I’ll walk you through a step-by-step process to make a delicious plate of nasi goreng, along with helpful tips to ensure success.
Ingredients and Preparation
To make a classic plate of nasi goreng, you’ll need the following ingredients:
Main Ingredients:
- 2 cups cooked rice (preferably leftover rice, refrigerated overnight for better texture)
- 2 tbsp cooking oil (vegetable, canola, or peanut oil)
- 2 cloves garlic, minced
- 1 small onion, finely chopped
- 1 red chili, sliced (optional, for spice)
- ½ cup mixed vegetables (carrots, peas, bell peppers, or cabbage)
- ½ cup protein of choice (chicken, shrimp, tofu, or tempeh)
- 1 tbsp sweet soy sauce (kecap manis)
- 1 tbsp soy sauce
- ½ tsp salt (or to taste)
- ½ tsp black pepper
- 1 tsp shrimp paste or fish sauce (optional, for an authentic umami boost)
- 1 fried egg (for serving)
Optional Garnishes:
- Fried shallots
- Fresh cucumber slices
- Pickled vegetables
- Lime wedges
Ingredient Substitutions:
- If you don’t have sweet soy sauce (kecap manis), mix regular soy sauce with a little brown sugar or honey.
- Swap out shrimp paste for a splash of fish sauce or leave it out for a vegetarian version.
- Use brown rice for a healthier alternative.
Step-by-Step Instructions
Step 1: Prepare Your Ingredients
Before you start cooking, gather all your ingredients and have them ready to go. Since stir-frying happens quickly, it’s important to have everything prepped in advance. Chop your vegetables, mince the garlic, slice the chili, and set aside your proteins.
Tip: If using fresh rice, spread it out on a plate and let it cool for at least 30 minutes to prevent it from becoming mushy.
Step 2: Heat the Oil and Sauté the Aromatics
- Heat 2 tablespoons of oil in a large wok or skillet over medium-high heat.
- Add the minced garlic, chopped onion, and sliced chili. Stir-fry for about 30 seconds until fragrant.
Beginner’s Note: Be careful not to burn the garlic—it should turn golden, not brown. Stir continuously for even cooking.
Step 3: Cook the Protein and Vegetables
- Add your protein of choice (chicken, shrimp, tofu, or tempeh) to the pan. Stir-fry until fully cooked.
- Toss in the mixed vegetables and continue stirring for another 2 minutes.
Tip: If using shrimp, cook it until it turns pink. If using tofu, let it crisp up slightly for a better texture.
Step 4: Add the Rice and Seasonings
- Add the cold, cooked rice to the wok, breaking up any clumps with a spatula.
- Pour in the sweet soy sauce, regular soy sauce, salt, black pepper, and shrimp paste (if using).
- Stir everything together until the rice is evenly coated and heated through.
Beginner’s Note: Use a folding motion to mix the rice rather than pressing it down. This keeps the grains separate and prevents a sticky texture.
Step 5: Fry the Egg and Serve
- In a separate pan, heat a little oil and fry an egg to your desired doneness (crispy edges are ideal).
- Serve the nasi goreng on a plate, topped with the fried egg and garnished with fried shallots, cucumber slices, and lime wedges.
Beginner Tips and Notes
1. How to Avoid Soggy Rice
The secret to perfect fried rice is using day-old rice. Freshly cooked rice tends to be too moist and sticky, resulting in a mushy texture. If you only have fresh rice, spread it out on a tray and let it cool for at least 30 minutes before using it.
2. Adjusting the Spice Level
If you’re not a fan of spicy food, you can skip the red chili or replace it with bell peppers for a milder flavor. If you love heat, consider adding sambal oelek or extra chili slices.
3. What to Do If Your Rice Sticks to the Pan
If your rice starts sticking, lower the heat slightly and add a little more oil. Stir constantly to prevent burning.
4. How to Make Nasi Goreng Without a Wok
No wok? No problem! Use a large nonstick skillet to get similar results. A heavy-bottomed pan helps distribute heat evenly.
5. Can You Make Nasi Goreng Without Oil?
If you’re looking for a lower-fat version, use a nonstick pan and a small amount of water to stir-fry the ingredients. However, traditional nasi goreng relies on oil to develop its signature texture and flavor.

Serving Suggestions
Side Dishes That Pair Well with Nasi Goreng
- Acar (Indonesian pickled vegetables) – Adds a refreshing crunch.
- Krupuk (shrimp crackers) – A classic side that provides a crispy contrast.
- Sambal (chili paste) – Enhances the spice factor for those who enjoy heat.
- Gado-Gado (Indonesian salad with peanut sauce) – A nutritious and flavorful pairing.
How to Store and Reheat Leftovers
- Refrigeration: Store leftover nasi goreng in an airtight container for up to 3 days.
- Reheating: Heat it in a pan with a bit of oil to restore its crispiness. Avoid microwaving as it can make the rice soggy.
- Freezing: Nasi goreng can be frozen for up to 1 month. Thaw overnight and reheat in a pan.
Conclusion: Try It and Make It Your Own!
Nasi goreng is more than just a fried rice dish—it’s a versatile and beginner-friendly meal that allows you to experiment with different ingredients and flavors. Whether you follow this recipe exactly or tweak it to suit your tastes, the beauty of nasi goreng is in its flexibility.
I encourage you to give this recipe a try and share your experience! Did you add a unique twist? Did you struggle with any step? Let me know in the comments—I’d love to hear how your nasi goreng turned out. Happy cooking! 🍳🥢