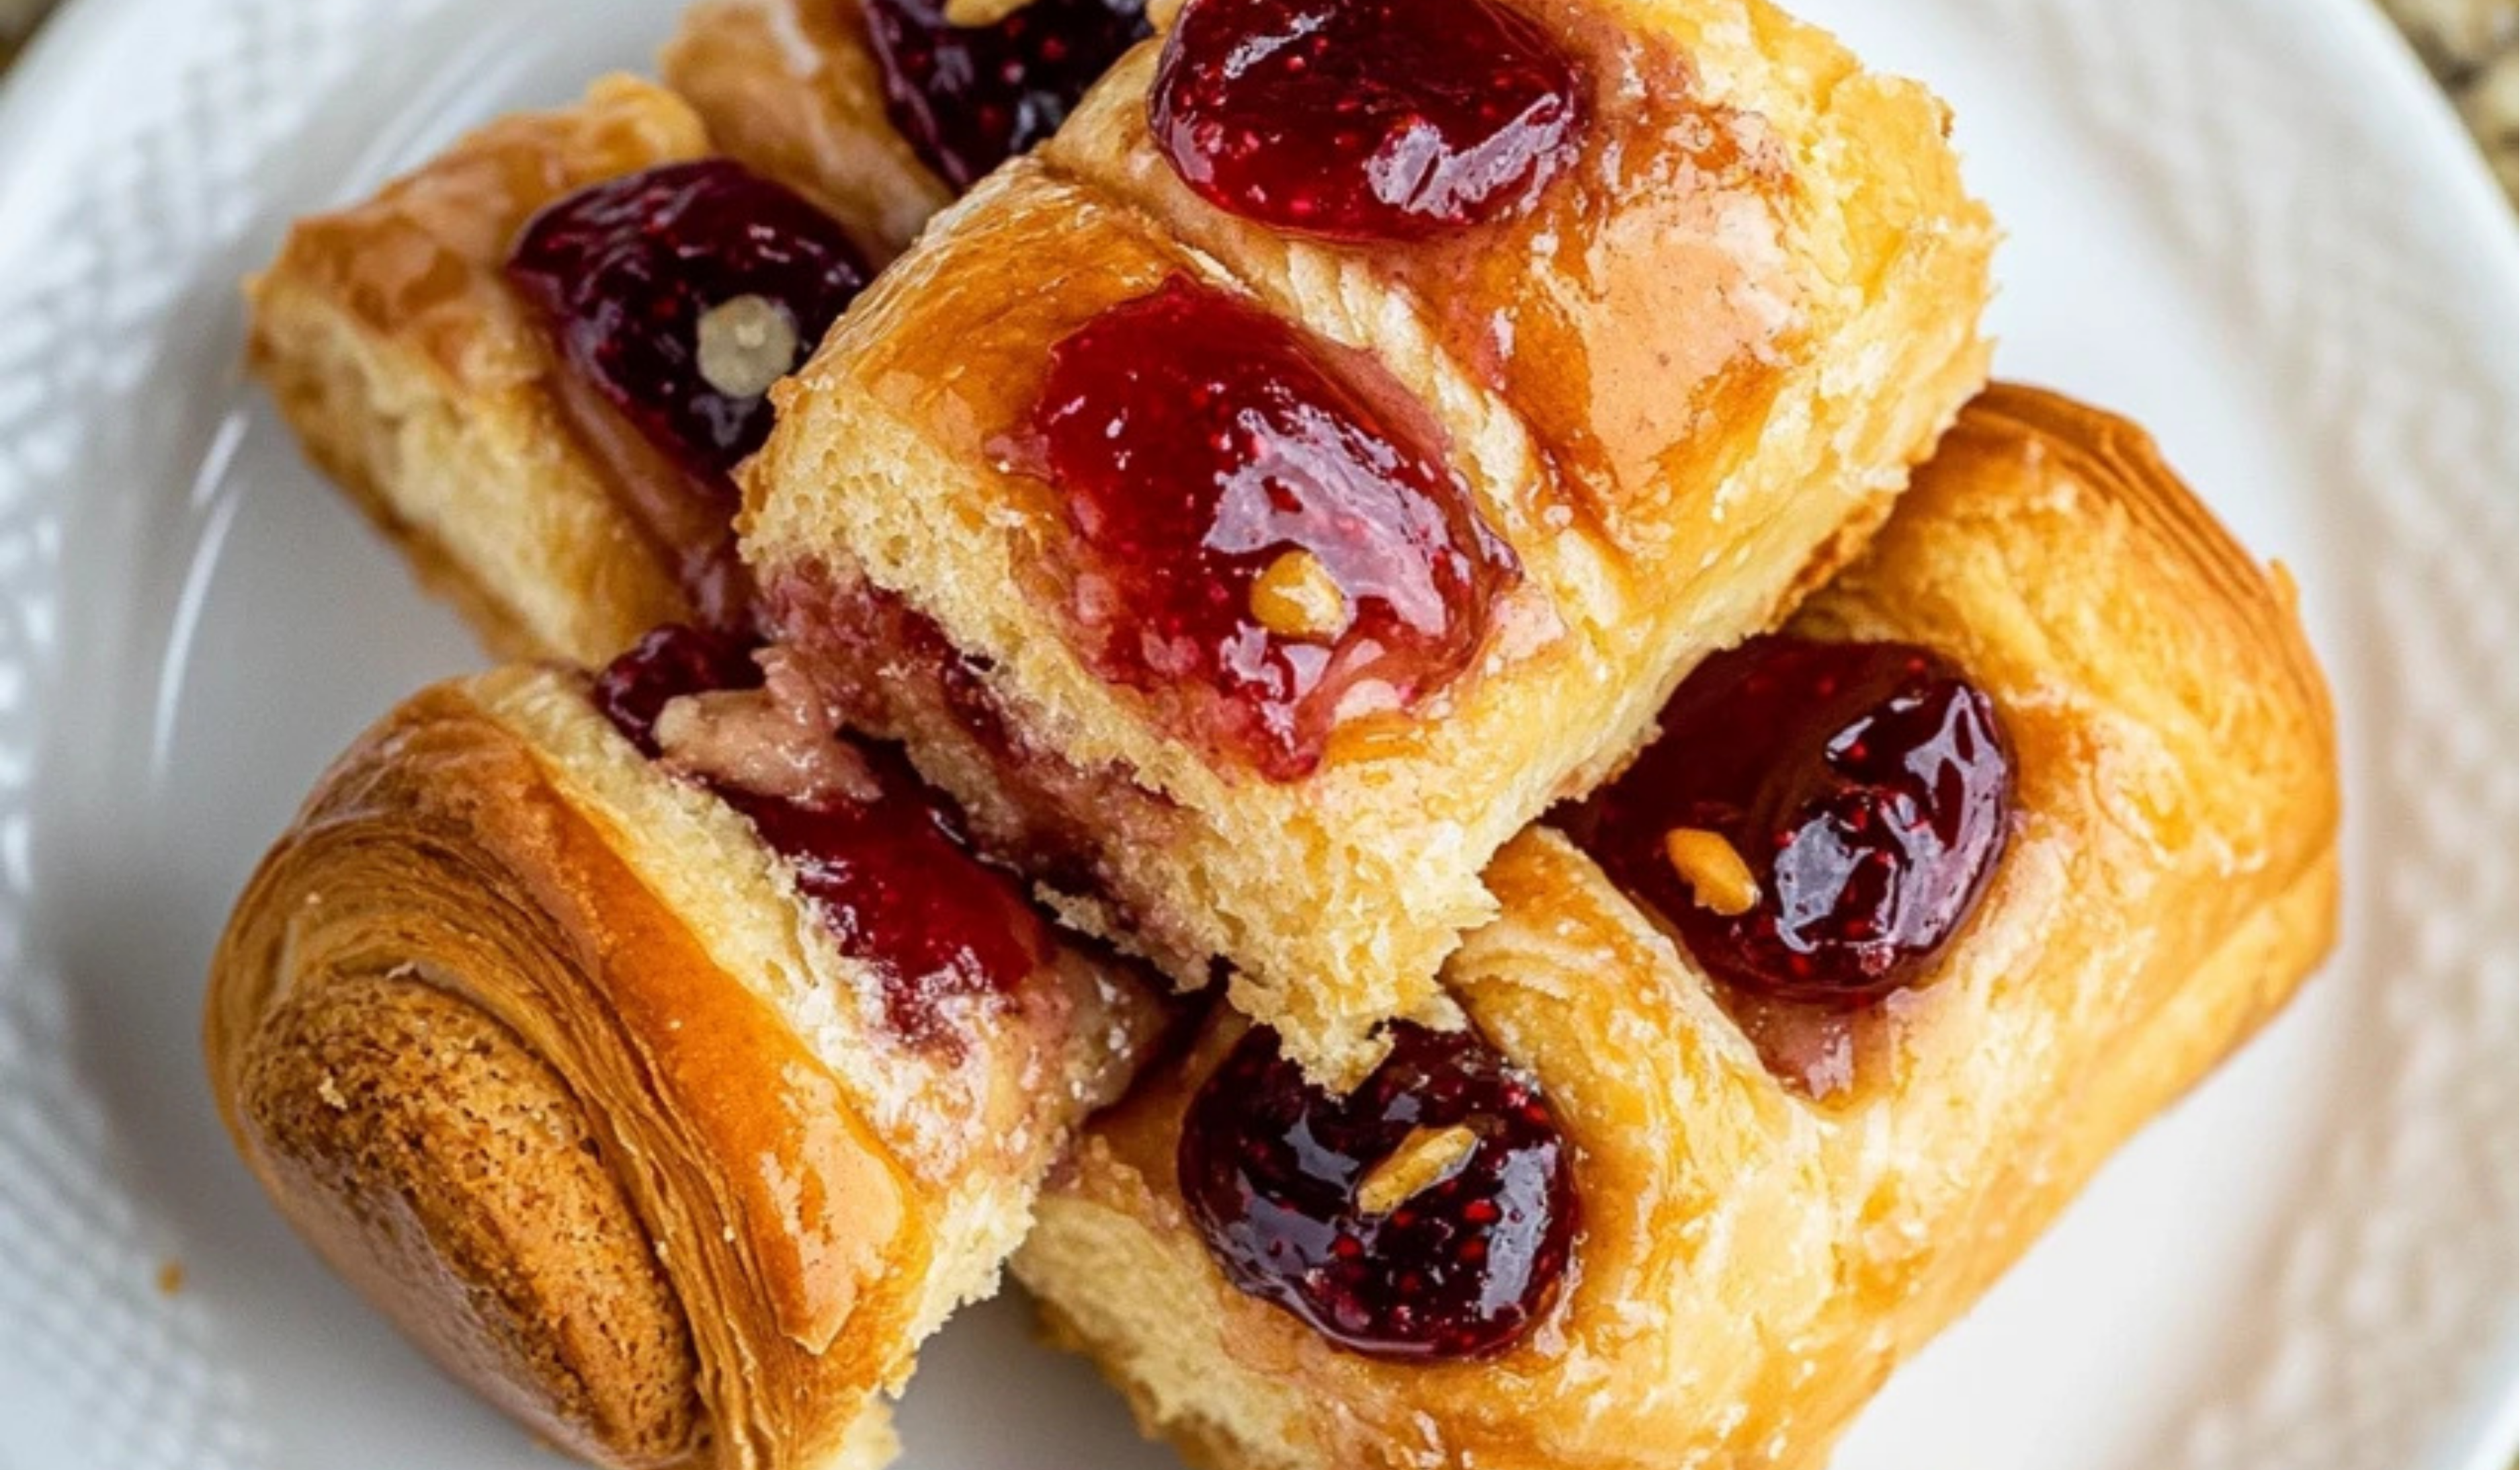
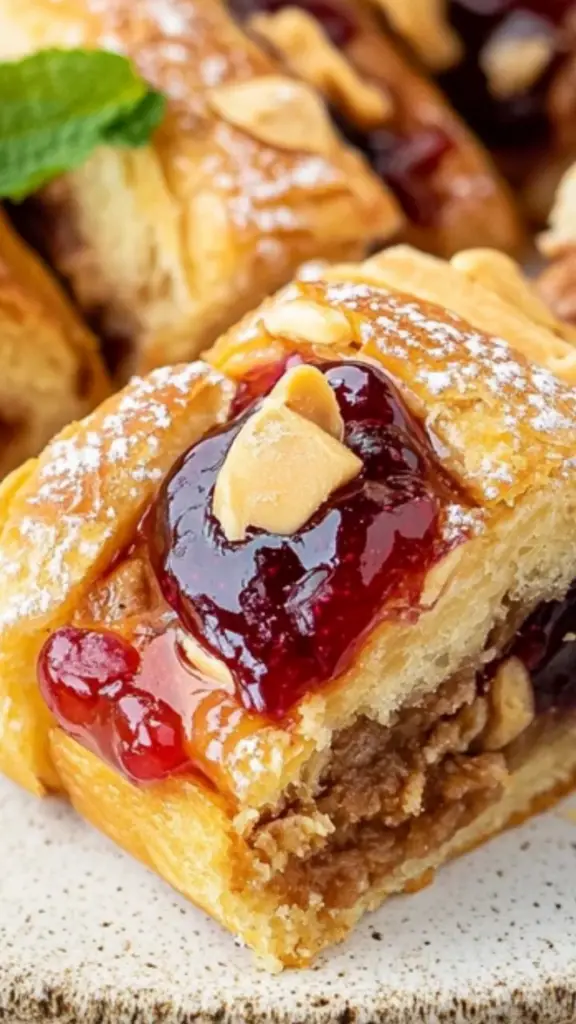
Peanut Butter and Jelly Hawaiian Roll Cheese Danish: A Nostalgic and Easy Treat for Beginners
There is something special about the classic peanut butter and jelly combination. For many, it brings back childhood memories of packed school lunches, afternoon snacks, or simple meals enjoyed at home. This recipe takes those familiar flavors and transforms them into a warm, creamy, and slightly crispy Danish-style treat using Hawaiian sweet rolls.
PrintPeanut Butter and Jelly Hawaiian Roll Cheese Danish: A Nostalgic and Easy Treat for Beginners

This Peanut Butter and Jelly Hawaiian Roll Cheese Danish combines childhood nostalgia with a rich, creamy twist. Buttery Hawaiian rolls, sweet cream cheese, and the perfect PB&J combo make this an irresistible treat! 🧀🥖✨
- Prep Time: 12 minutes
- Cook Time: 12 minutes
- Total Time: 24 minutes
- Yield: 12 servings 1x
Ingredients
- 3 tablespoons butter, melted (for greasing the pan)
- 12-pack Hawaiian sweet rolls
- 8 ounces cream cheese, softened
- 4 tablespoons granulated sugar
- 1/3 cup peanut butter (smooth or crunchy)
- 1/3 cup grape jelly (or any preferred fruit jelly)
- 1/4 cup salted peanuts, coarsely chopped
Optional Glaze
- 1 cup powdered sugar
- 2 to 3 tablespoons heavy cream (or milk)
- 1 teaspoon vanilla extract
Instructions
Step 1: Prepare the Baking Dish
Preheat the oven to 375°F. Melt three tablespoons of butter and evenly spread it across a 7×12-inch baking dish, sheet pan, or any pan with sides. This step helps prevent sticking and adds a buttery crispness to the bottom of the rolls.
Step 2: Prepare the Rolls
Place the Hawaiian rolls into the prepared baking dish. Using a small knife, cut a deep hole into each roll, going about two-thirds of the way down but not cutting through the bottom. Each cavity should be large enough to hold about one tablespoon of the filling.
Step 3: Make the Filling
In a mixing bowl, beat together the softened cream cheese, granulated sugar, and peanut butter until smooth and well combined. A hand mixer makes this process faster, but a spoon or whisk can also be used.
Step 4: Fill the Rolls
Using two small spoons, scoop the peanut butter and cream cheese mixture into each roll cavity. Once filled, use the back of a spoon to create a small well in the center of the mixture. This well will hold the jelly and prevent it from spilling over.
Step 5: Add the Jelly
Stir the jelly to loosen its consistency. Using a spoon, place about one teaspoon of jelly into the well of each roll. Be careful not to overfill, as the jelly will spread when baking.
Step 6: Bake the Rolls
Place the baking dish in the preheated oven and bake uncovered at 350°F for 12 to 15 minutes. The tops should become lightly golden, and the filling should be warm and slightly set.
Step 7: Cool and Garnish
Allow the rolls to cool for a few minutes before serving. The jelly will be very hot straight out of the oven and may be runny. Sprinkle the chopped salted peanuts on top for added crunch and flavor.
Step 8: Add the Optional Glaze
For a sweeter finish, whisk together powdered sugar, heavy cream (or milk), and vanilla extract until smooth. Drizzle the glaze over the warm rolls before serving.
Notes
- Avoid overfilling the rolls, as too much jelly can cause it to spill over while baking. Keeping the jelly contained in the well helps maintain the perfect balance of flavors.
- If a nut-free version is needed, substitute peanut butter with sunflower seed butter or cookie butter. A dairy-free cream cheese alternative can also be used.
- For a crispier texture, broil the rolls for an additional one to two minutes at the end of baking. Watch closely to prevent burning.
- Store leftovers in an airtight container in the refrigerator for up to four days. To reheat, use a toaster oven or microwave for a few seconds to restore warmth and softness.
- These rolls are best served warm. If preparing for a gathering, keep them covered with foil to retain heat.
This Peanut Butter and Jelly Hawaiian Roll Cheese Danish is perfect for beginner bakers. It requires minimal effort, simple ingredients, and no complicated techniques. By using premade Hawaiian rolls instead of traditional pastry dough, this recipe simplifies the process while maintaining a rich, indulgent flavor. The combination of peanut butter, cream cheese, and jelly creates a deliciously balanced filling, while the soft rolls absorb just enough of the buttery base to become slightly crisp on the edges while remaining tender in the center.
One of the best things about this recipe is its versatility. It can be served as a breakfast treat, a sweet snack, or even a light dessert. It is also a great way to introduce beginner cooks to the basics of baking without the intimidation of working with homemade dough or pastry. Whether making this for a family breakfast, a gathering with friends, or simply as a comforting treat to enjoy with a warm drink, this recipe delivers a satisfying experience with minimal effort.
Ingredients and Preparation
Before getting started, gather all the necessary ingredients.
Ingredients
- 3 tablespoons butter, melted (for greasing the pan)
- 12-pack Hawaiian sweet rolls
- 8 ounces cream cheese, softened
- 4 tablespoons granulated sugar
- 1/3 cup peanut butter (smooth or crunchy)
- 1/3 cup grape jelly (or any preferred fruit jelly)
- 1/4 cup salted peanuts, coarsely chopped
Optional Glaze
- 1 cup powdered sugar
- 2 to 3 tablespoons heavy cream (or milk)
- 1 teaspoon vanilla extract
Preparation Tips
- Hawaiian sweet rolls are ideal for this recipe because of their slightly sweet, fluffy texture. If unavailable, soft dinner rolls can be used as a substitute.
- Ensure the cream cheese is at room temperature to make mixing easier and create a smooth filling.
- Grape jelly provides a traditional peanut butter and jelly flavor, but feel free to use strawberry, raspberry, or another preferred fruit preserve.
- Chopped salted peanuts add crunch and enhance the flavor. If a smoother texture is preferred, they can be omitted or replaced with crushed graham crackers for a milder crunch.
Step-by-Step Instructions
Step 1: Prepare the Baking Dish
Preheat the oven to 375°F. Melt three tablespoons of butter and evenly spread it across a 7×12-inch baking dish, sheet pan, or any pan with sides. This step helps prevent sticking and adds a buttery crispness to the bottom of the rolls.
Step 2: Prepare the Rolls
Place the Hawaiian rolls into the prepared baking dish. Using a small knife, cut a deep hole into each roll, going about two-thirds of the way down but not cutting through the bottom. Each cavity should be large enough to hold about one tablespoon of the filling.
Step 3: Make the Filling
In a mixing bowl, beat together the softened cream cheese, granulated sugar, and peanut butter until smooth and well combined. A hand mixer makes this process faster, but a spoon or whisk can also be used.
Step 4: Fill the Rolls
Using two small spoons, scoop the peanut butter and cream cheese mixture into each roll cavity. Once filled, use the back of a spoon to create a small well in the center of the mixture. This well will hold the jelly and prevent it from spilling over.
Step 5: Add the Jelly
Stir the jelly to loosen its consistency. Using a spoon, place about one teaspoon of jelly into the well of each roll. Be careful not to overfill, as the jelly will spread when baking.
Step 6: Bake the Rolls
Place the baking dish in the preheated oven and bake uncovered at 350°F for 12 to 15 minutes. The tops should become lightly golden, and the filling should be warm and slightly set.
Step 7: Cool and Garnish
Allow the rolls to cool for a few minutes before serving. The jelly will be very hot straight out of the oven and may be runny. Sprinkle the chopped salted peanuts on top for added crunch and flavor.
Step 8: Add the Optional Glaze
For a sweeter finish, whisk together powdered sugar, heavy cream (or milk), and vanilla extract until smooth. Drizzle the glaze over the warm rolls before serving.
Beginner Tips and Notes
- Avoid overfilling the rolls, as too much jelly can cause it to spill over while baking. Keeping the jelly contained in the well helps maintain the perfect balance of flavors.
- If a nut-free version is needed, substitute peanut butter with sunflower seed butter or cookie butter. A dairy-free cream cheese alternative can also be used.
- For a crispier texture, broil the rolls for an additional one to two minutes at the end of baking. Watch closely to prevent burning.
- Store leftovers in an airtight container in the refrigerator for up to four days. To reheat, use a toaster oven or microwave for a few seconds to restore warmth and softness.
- These rolls are best served warm. If preparing for a gathering, keep them covered with foil to retain heat.
Serving Suggestions
This Peanut Butter and Jelly Hawaiian Roll Cheese Danish pairs well with a variety of complementary foods and beverages.
- Serve as a breakfast treat with fresh fruit, such as sliced bananas, strawberries, or apples, for a balanced meal. A glass of milk or a cup of coffee makes a great accompaniment.
- For a more indulgent dessert, serve with a scoop of vanilla ice cream or drizzle honey over the top.
- To balance the sweetness, pair with scrambled eggs, chicken sausage, or a simple green salad if serving as part of a brunch spread.
- Serve with a side of warm chocolate sauce or fruit compote for dipping.
Engagement Features
Baking can be an enjoyable and rewarding experience, especially when sharing with others.
- Try different variations by using almond butter, cashew butter, or flavored cream cheese for a unique twist.
- Experiment with different toppings, such as shredded coconut, crushed pretzels, or mini chocolate chips.
- If you make this recipe, share your thoughts and results. Did you make any modifications? What was your favorite part of the recipe?
This Peanut Butter and Jelly Hawaiian Roll Cheese Danish is an easy, beginner-friendly recipe that transforms a childhood classic into a warm and satisfying baked treat. The simplicity of premade rolls combined with a rich and creamy filling makes it perfect for those new to baking. Whether enjoyed for breakfast, as a snack, or a fun dessert, this recipe provides a delicious and comforting experience. Try it out and enjoy the nostalgic flavors in a new and delightful way.