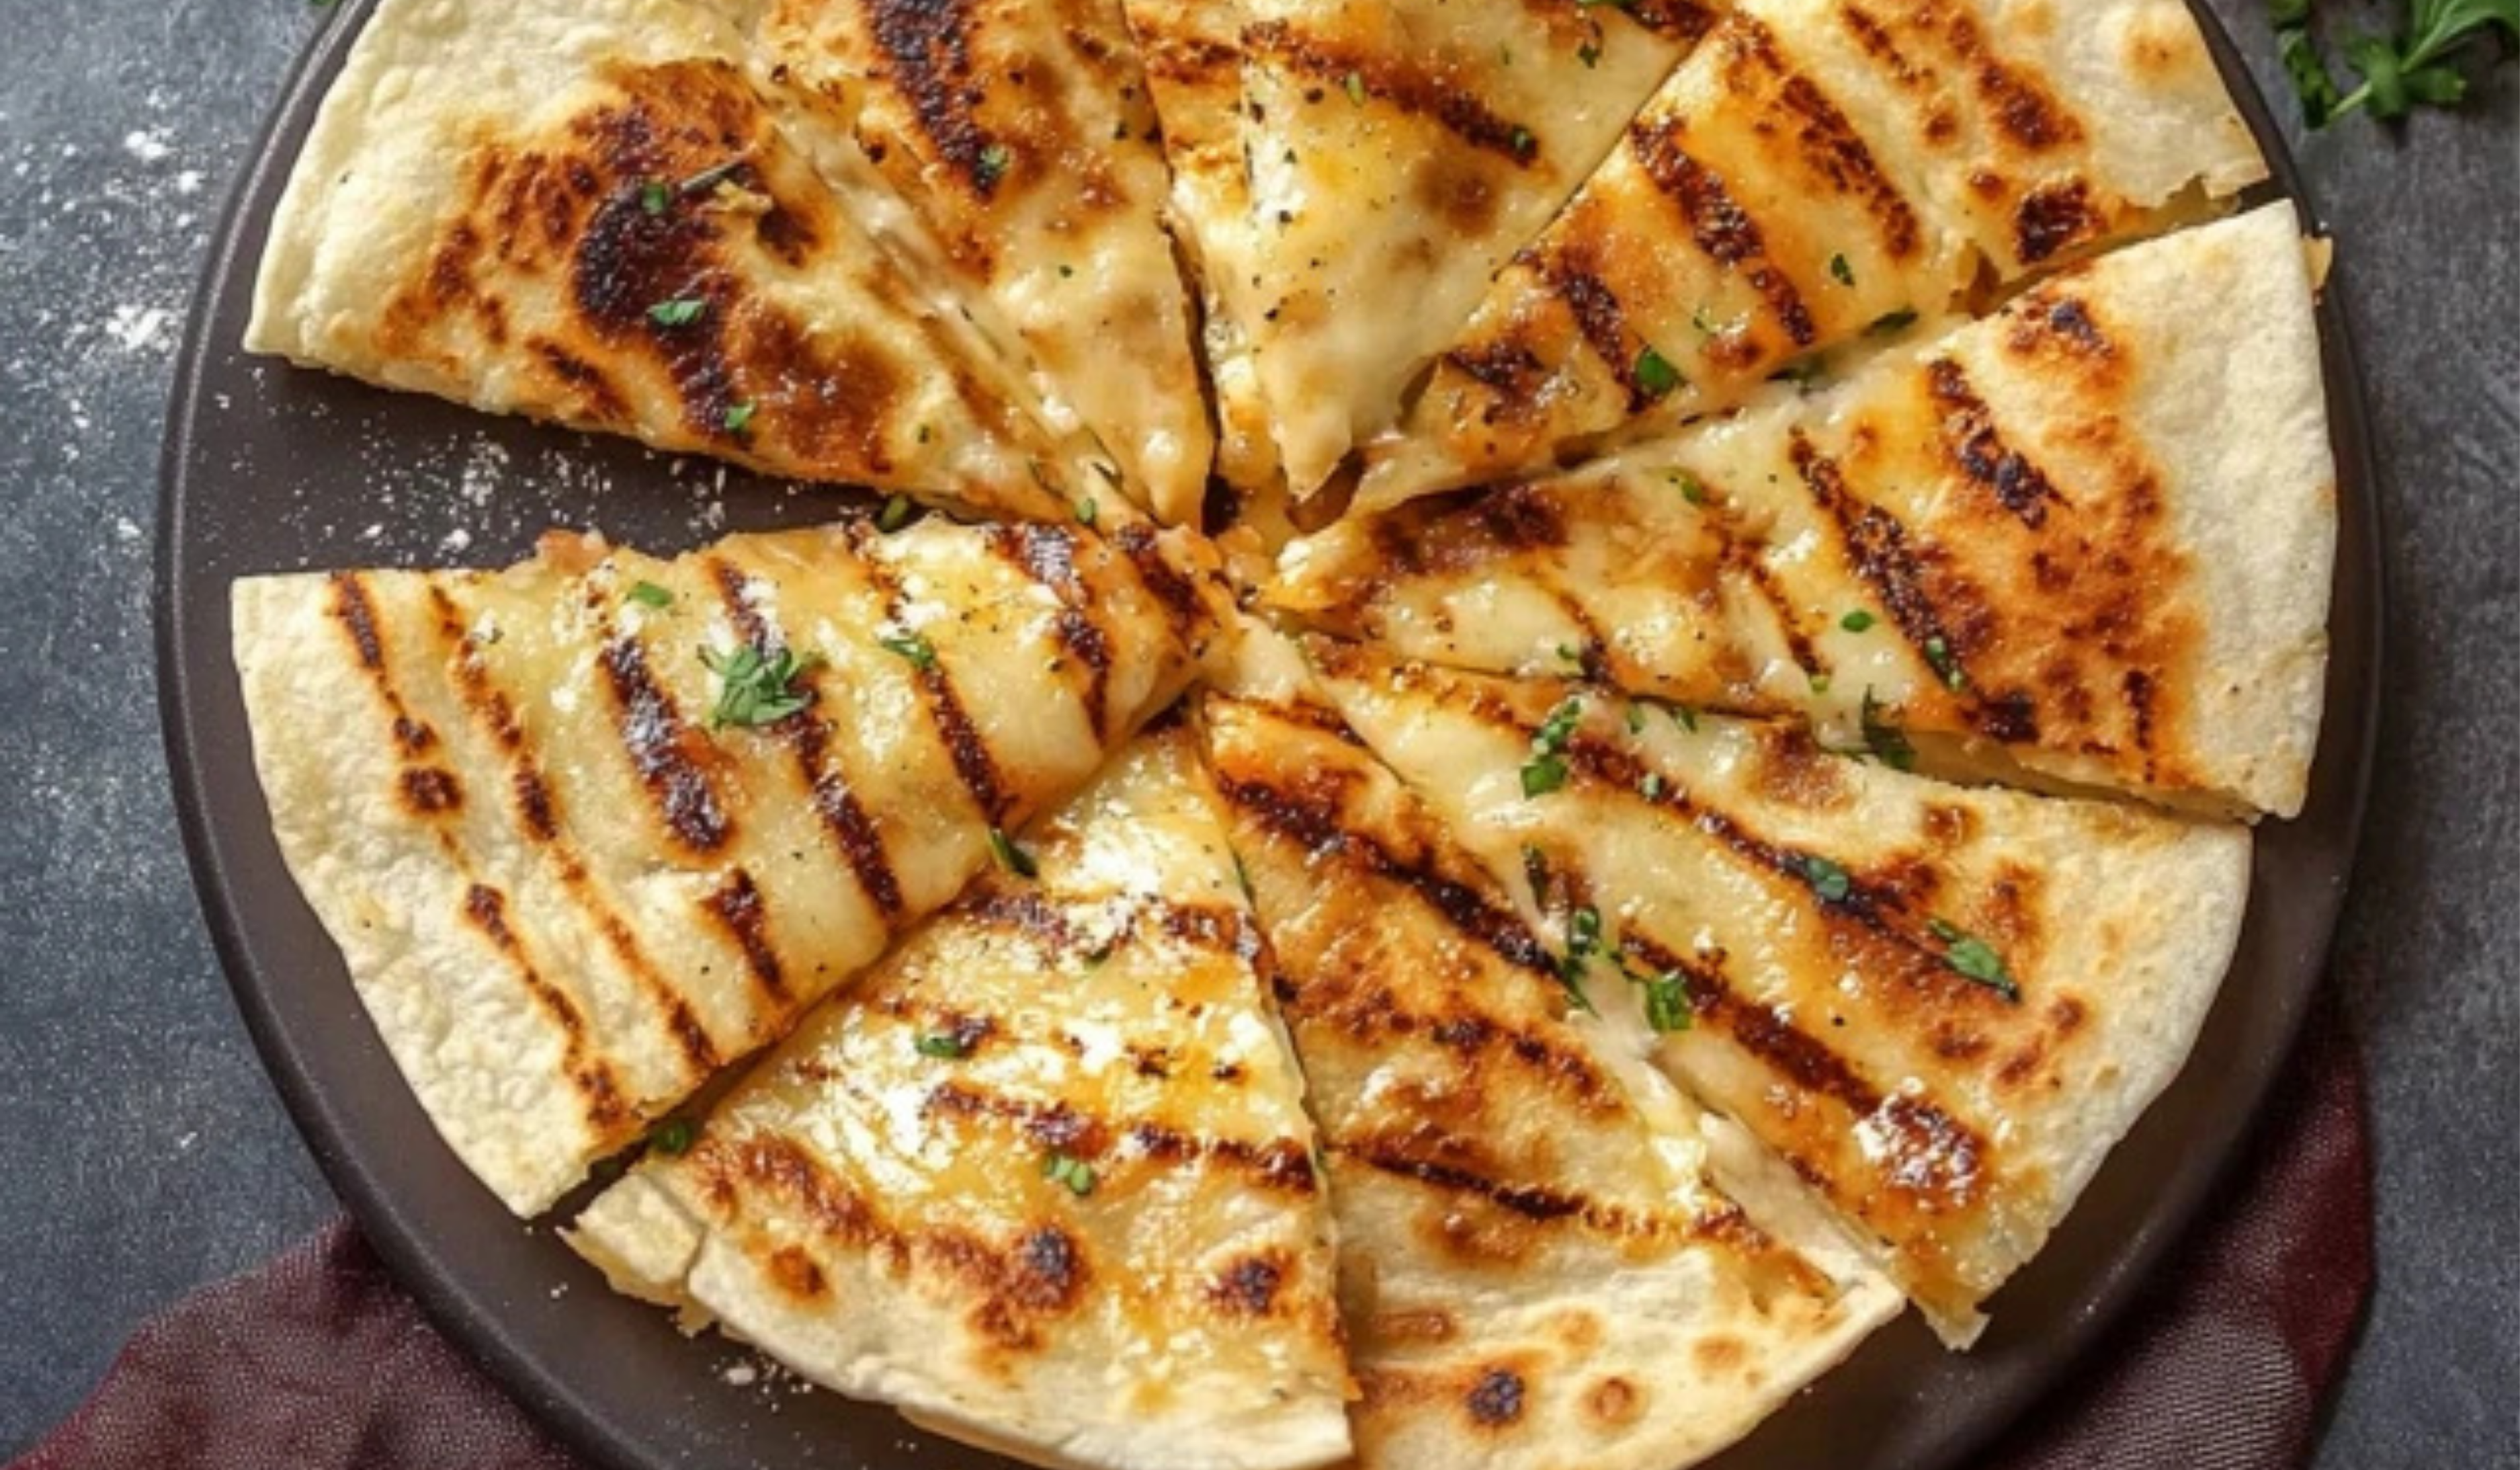
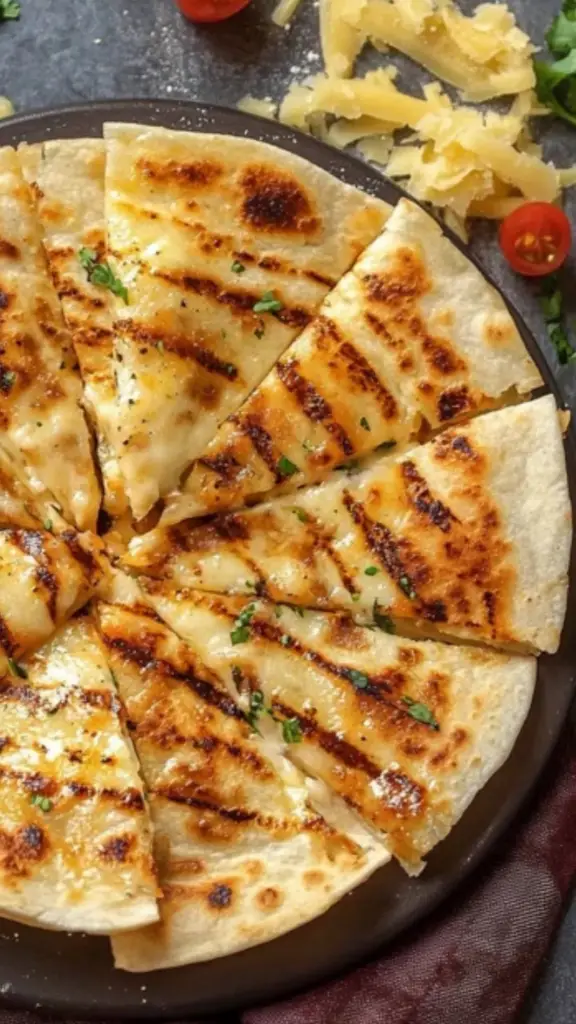
THE BEST CHEESE QUESADILLA RECIPE FOR BEGINNERS
Everyone has a comfort food that’s quick to make, deliciously satisfying, and brings a little joy to the day. For many, a cheese quesadilla fits that role perfectly. When I made my first quesadilla as a college freshman with only a pan, some shredded cheese, and leftover tortillas, I felt like a real cook. That simple moment kick-started a love for kitchen creativity—one gooey bite at a time.
PrintTHE BEST CHEESE QUESADILLA RECIPE FOR BEGINNERS

The ultimate cheesy comfort food—made easy! 🧀🌟 This beginner-friendly Cheese Quesadilla is buttery, crisp, and loaded with gooey goodness. All you need is a tortilla, your favorite cheese, and a few minutes on the stove. 🫓💥 Whether you’re feeding kids, craving a late-night snack, or just learning the kitchen ropes, this recipe is a delicious win. Serve with salsa, guac, or sour cream and enjoy every melty bite! 🧄🌮
- Prep Time: 5 minutes
- Cook Time: 15 minutes
- Total Time: 20 minutes
- Yield: 30 mini quesadillas or 4 large quesadillas 1x
Ingredients
- 30 wonton or gyoza wrappers – or 4 large flour tortillas if you prefer a more classic quesadilla
- 2 ½ cups shredded Mexican cheese blend – or use a combination of cheddar, Monterey Jack, or mozzarella
- 4 to 5 tablespoons butter, melted
- 1 teaspoon garlic powder
- 1 tablespoon olive oil – or additional butter for cooking the quesadillas
Optional Protein Additions
Want to make it more filling? Try adding:
- Cooked shredded chicken breast – about 1 to 1½ cups
- Seasoned ground beef – drained and cooled before adding
These can be layered in with the cheese before folding the quesadilla.
Instructions
Step 1: Prep the Pan
Heat a non-stick or cast-iron skillet over medium heat. Add a small amount of olive oil or butter to lightly coat the surface.
Step 2: Assemble the Quesadillas
Lay your wonton wrappers or tortillas flat. Brush one side with the garlic butter mixture. Flip them over so the buttered side is on the outside.
On the unbuttered side, sprinkle a small amount of shredded cheese over one half of each wrapper or tortilla. Add any optional protein if using. Fold the wrapper or tortilla in half over the filling to form a half-moon shape.
Do not press down or seal the edges—this will allow the cheese to melt naturally and evenly inside.
Step 3: Cook
Place several mini quesadillas or one large tortilla into the hot pan, depending on the pan size. Cook uncovered for 2 to 3 minutes until the bottom is golden and crispy.
Flip each quesadilla carefully with a spatula and cook for another 1 to 2 minutes until the cheese has melted and the second side is golden brown.
Step 4: Serve
Remove from heat and transfer to a cutting board. Let them cool for a minute, then cut into halves or quarters if using large tortillas.
Serve immediately with your favorite dips and sides.
Notes
What if my quesadilla browns too fast?
If your pan is too hot, the outside will brown before the cheese melts. Lower the heat slightly and give it a little more time to crisp slowly.
What if the cheese doesn’t melt?
This can happen if your cheese is too cold or the heat is too low. Let shredded cheese sit at room temperature for 10 minutes before using. Cover the pan with a lid for 30 seconds during cooking to trap heat and help melt the cheese faster.
How do I avoid soggy quesadillas?
Make sure your fillings (especially meat or veggies) are not too wet. If using vegetables, sauté them first to reduce moisture.
Efficient Prep Tip
Set up a mini assembly line: wrappers, cheese, optional fillings, then a bowl of garlic butter. Pre-assembling your quesadillas before heating the pan makes the cooking process faster and smoother.
Tool Substitutes
If you don’t have a cast-iron skillet, a non-stick pan works just as well. No pastry brush for the garlic butter? Use the back of a spoon or your fingers (just be careful—melted butter is hot).
What makes quesadillas such a perfect starting point for beginner cooks is their beautiful simplicity. They don’t require fancy kitchen gadgets or hard-to-find ingredients. You’re looking at a hot pan, a few pantry staples, and less than 20 minutes. The result? Crispy golden edges and a warm, melty center that hits the spot every time.
This version of the classic cheese quesadilla uses either wonton wrappers for a fun twist or regular large tortillas for a traditional approach. The garlic butter adds a flavor boost, while the melty Mexican cheese blend gives it that irresistible stretch. Whether you’re making this as an after-school snack, a quick lunch, or party finger food, you’re about to master a crowd-pleaser with ease.
Let’s dive into the details and get you cooking confidently.
Ingredients and Preparation
Here’s everything you’ll need to make around 30 mini quesadillas or a handful of large ones. Don’t worry—substitutions are included if you want to customize.
Ingredients
- 30 wonton or gyoza wrappers – or 4 large flour tortillas if you prefer a more classic quesadilla
- 2 ½ cups shredded Mexican cheese blend – or use a combination of cheddar, Monterey Jack, or mozzarella
- 4 to 5 tablespoons butter, melted
- 1 teaspoon garlic powder
- 1 tablespoon olive oil – or additional butter for cooking the quesadillas
Optional Protein Additions
Want to make it more filling? Try adding:
- Cooked shredded chicken breast – about 1 to 1½ cups
- Seasoned ground beef – drained and cooled before adding
These can be layered in with the cheese before folding the quesadilla.
Preparation
- Garlic Butter: Mix the melted butter with garlic powder in a small bowl and set aside.
- Protein (if using): Pre-cook your chicken or beef and season lightly with salt, pepper, and a pinch of cumin or paprika for extra depth. Let it cool slightly before assembling to avoid soggy quesadillas.
- Cheese: Use freshly shredded cheese if possible—it melts better than the pre-packaged kind.
Step-by-Step Instructions
Step 1: Prep the Pan
Heat a non-stick or cast-iron skillet over medium heat. Add a small amount of olive oil or butter to lightly coat the surface.
Step 2: Assemble the Quesadillas
Lay your wonton wrappers or tortillas flat. Brush one side with the garlic butter mixture. Flip them over so the buttered side is on the outside.
On the unbuttered side, sprinkle a small amount of shredded cheese over one half of each wrapper or tortilla. Add any optional protein if using. Fold the wrapper or tortilla in half over the filling to form a half-moon shape.
Do not press down or seal the edges—this will allow the cheese to melt naturally and evenly inside.
Step 3: Cook
Place several mini quesadillas or one large tortilla into the hot pan, depending on the pan size. Cook uncovered for 2 to 3 minutes until the bottom is golden and crispy.
Flip each quesadilla carefully with a spatula and cook for another 1 to 2 minutes until the cheese has melted and the second side is golden brown.
Step 4: Serve
Remove from heat and transfer to a cutting board. Let them cool for a minute, then cut into halves or quarters if using large tortillas.
Serve immediately with your favorite dips and sides.
Beginner Tips and Notes
What if my quesadilla browns too fast?
If your pan is too hot, the outside will brown before the cheese melts. Lower the heat slightly and give it a little more time to crisp slowly.
What if the cheese doesn’t melt?
This can happen if your cheese is too cold or the heat is too low. Let shredded cheese sit at room temperature for 10 minutes before using. Cover the pan with a lid for 30 seconds during cooking to trap heat and help melt the cheese faster.
How do I avoid soggy quesadillas?
Make sure your fillings (especially meat or veggies) are not too wet. If using vegetables, sauté them first to reduce moisture.
Efficient Prep Tip
Set up a mini assembly line: wrappers, cheese, optional fillings, then a bowl of garlic butter. Pre-assembling your quesadillas before heating the pan makes the cooking process faster and smoother.
Tool Substitutes
If you don’t have a cast-iron skillet, a non-stick pan works just as well. No pastry brush for the garlic butter? Use the back of a spoon or your fingers (just be careful—melted butter is hot).
Serving Suggestions
Quesadillas are extremely versatile and pair beautifully with a variety of sides. Here are a few ideas:
- Salsas: Classic tomato salsa, mango salsa, or roasted corn salsa
- Dips: Guacamole, sour cream, or a creamy yogurt-lime dip
- Extras: Pico de gallo, chopped fresh cilantro, or sliced avocado
- Sauces: Try them with enchilada sauce or a simple red chili sauce for a bolder flavor
These also make excellent party snacks. Cut them into small triangles and serve on a platter with toothpicks and a trio of dips for a festive touch.
Leftover Storage
If you have leftovers, allow the quesadillas to cool completely before storing. Wrap them in foil or place them in an airtight container and refrigerate for up to 3 days. Reheat in a dry skillet or toaster oven to restore crispness—microwaving is convenient, but it can make them soggy.
Beginner-Friendly Variations
Once you’ve nailed the basics, here are some fun ways to switch things up:
- Spicy Kick: Add diced jalapeños or a dash of hot sauce inside before folding.
- Veggie Boost: Sautéed mushrooms, spinach, or bell peppers add texture and nutrients.
- Meaty Version: Swap the cheese blend for shredded chicken or ground beef mixed with taco seasoning for a protein-rich meal.
Each version can still be cooked in the same way—just ensure your fillings are cooked and not overly wet.
Engagement Features
Learning how to cook doesn’t mean starting with gourmet meals. It starts with something like this—a cheese quesadilla that’s simple, satisfying, and full of potential to customize. It’s the kind of dish that gives you confidence. You can make it for yourself after a long day, whip up a tray for friends, or serve it alongside other dishes at a gathering.
If this is your first time making quesadillas, give it a try and see how easy and rewarding it can be. Then, try making it again with your favorite twists. Share your version—did you go spicy, meaty, extra cheesy, or add a new dip to the mix? I’d love to hear how it went.
Cooking is a journey, and even the simplest recipes like this one can be a big step. Keep experimenting, keep learning, and most importantly—enjoy every bite.