The Ultimate Guide to Baked Chicken and Cheese Quesadillas for Beginners
Quesadillas are a staple of Mexican and Tex-Mex cuisine, offering a perfect balance of crispy tortillas and a creamy, cheesy filling. Whether you are making a quick lunch, a satisfying dinner, or a snack for game day, this recipe delivers on flavor and simplicity. Baking quesadillas in the oven ensures an even crispiness without the need for flipping them over a hot pan.
PrintThe Ultimate Guide to Baked Chicken and Cheese Quesadillas for Beginners

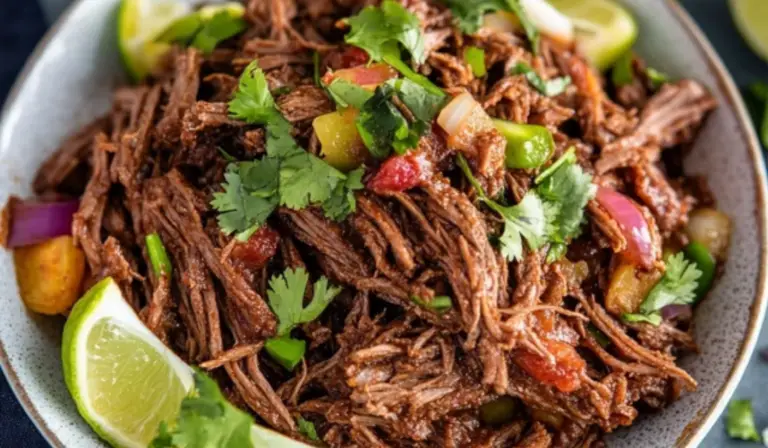
These Baked Chicken and Cheese Quesadillas are the perfect no-fuss meal—golden, crispy tortillas filled with melty cheese and tender, seasoned chicken. Baked to perfection for an easy, mess-free twist on a classic favorite, they’re perfect for quick dinners, meal prep, or party snacks! 🌮🔥🧄
- Prep Time: 10 minutes
- Cook Time: 20 minutes
- Total Time: 30 minutes
- Yield: 8 servings 1x
Ingredients
- ½ cup unsalted butter, melted
- 8 large flour tortillas
- 3 cups cooked chicken, shredded
- 1 cup sour cream
- 2 tablespoons taco seasoning
- 4 cups fiesta blend cheese, shredded
Instructions
1. Prepare the Baking Sheet
Preheat the oven to 400°F. Line a large baking sheet with parchment paper or a silicone baking mat. This prevents sticking and makes cleanup easier. Brush half of the melted butter over the parchment paper to add flavor and help the tortillas crisp up.
2. Prepare the Filling
In a large mixing bowl, combine the shredded chicken, sour cream, taco seasoning, and 3 cups of shredded cheese. Stir everything together until well combined. The sour cream adds a creamy texture that blends the flavors together.
3. Assemble the Quesadillas
Lay the tortillas flat on the prepared baking sheet. Place a scoop of the chicken mixture onto one half of each tortilla. Spread it out evenly to ensure every bite has a good balance of filling. Sprinkle a little extra cheese on top for added cheesiness. Fold the tortillas over, pressing down gently to secure the filling inside.
4. Brush with Butter
Brush the tops of the folded tortillas with the remaining melted butter. This step helps create a golden-brown and crispy exterior while adding rich flavor.
5. Bake the Quesadillas
Place the baking sheet in the preheated oven and bake for 10 minutes. Remove the tray from the oven and carefully flip each quesadilla over using a spatula. Return to the oven and bake for another 10 minutes or until the tortillas are golden brown and crispy.
6. Serve and Enjoy
Remove the quesadillas from the oven and let them cool slightly before slicing. Cut each quesadilla into halves or quarters and serve with your favorite dips and sides.
Notes
How to Tell If the Chicken is Cooked
If cooking raw chicken for this recipe, ensure that it reaches an internal temperature of 165°F. The meat should be white throughout, with no pink in the center. If using a rotisserie chicken, remove the skin and shred the meat for a quick and flavorful option.
How to Prevent Soggy Quesadillas
To keep your quesadillas crispy, avoid overfilling them. Too much filling can cause moisture buildup, making the tortillas soft instead of crispy. Baking at a high temperature also ensures a crispy texture.
How to Flip the Quesadillas Without Messing Them Up
Use a wide spatula to carefully flip the quesadillas halfway through baking. If you find that the tortillas are sticking, allow them to cook for an additional minute before attempting to flip.
How to Reheat Leftovers
For best results, reheat leftover quesadillas in the oven or a toaster oven at 375°F for about 5 minutes. This helps them retain their crispiness. Avoid microwaving, as it can make the tortillas soft.
For beginners, this recipe is an excellent starting point. It requires minimal ingredients, is easy to customize, and does not demand advanced cooking skills. If you have never made quesadillas before, this method will guide you through every step to guarantee success.
This baked version not only saves time but also allows you to cook multiple quesadillas at once, making it a great choice when cooking for a family or a gathering. The combination of shredded chicken, creamy sour cream, and melted cheese wrapped in a buttery, crispy tortilla creates an irresistible dish that will quickly become a household favorite.
Why This Recipe is Perfect for Beginners
This recipe is designed with simplicity in mind, making it perfect for beginner cooks. The step-by-step instructions are easy to follow, and baking eliminates the need for constant flipping and monitoring.
Shredded chicken is an ideal protein because it is easy to prepare, and using pre-cooked or rotisserie chicken makes the process even faster. The filling is straightforward, combining just a few ingredients that blend beautifully together. The tortillas crisp up perfectly in the oven without the risk of burning them in a pan.
Additionally, this recipe is highly customizable. You can swap ingredients based on what you have available or adjust the seasoning to match your personal taste. If you are new to cooking, this is an excellent dish to build confidence in the kitchen.
Ingredients and Substitutions
This recipe keeps things simple with a handful of easy-to-find ingredients. Each ingredient plays an essential role in creating the perfect balance of texture and flavor.
Ingredients
- ½ cup unsalted butter, melted
- 8 large flour tortillas
- 3 cups cooked chicken, shredded
- 1 cup sour cream
- 2 tablespoons taco seasoning
- 4 cups fiesta blend cheese, shredded
Ingredient Substitutions and Variations
- If you do not have shredded chicken, you can use ground chicken or ground beef as an alternative. Simply cook and season the meat before adding it to the quesadilla filling.
- Greek yogurt can be used instead of sour cream for a slightly tangy and healthier option.
- If you do not have taco seasoning, you can create your own blend using a combination of chili powder, cumin, paprika, garlic powder, onion powder, salt, and black pepper.
- While flour tortillas provide a soft and crispy texture, corn tortillas can be used for a more traditional Mexican-style quesadilla.
- Try adding diced bell peppers, onions, or mushrooms to the filling for extra flavor and nutrition.
Step-by-Step Instructions
Cooking these quesadillas in the oven allows you to prepare multiple servings at once while achieving a perfectly crispy texture.
1. Prepare the Baking Sheet
Preheat the oven to 400°F. Line a large baking sheet with parchment paper or a silicone baking mat. This prevents sticking and makes cleanup easier. Brush half of the melted butter over the parchment paper to add flavor and help the tortillas crisp up.
2. Prepare the Filling
In a large mixing bowl, combine the shredded chicken, sour cream, taco seasoning, and 3 cups of shredded cheese. Stir everything together until well combined. The sour cream adds a creamy texture that blends the flavors together.
3. Assemble the Quesadillas
Lay the tortillas flat on the prepared baking sheet. Place a scoop of the chicken mixture onto one half of each tortilla. Spread it out evenly to ensure every bite has a good balance of filling. Sprinkle a little extra cheese on top for added cheesiness. Fold the tortillas over, pressing down gently to secure the filling inside.
4. Brush with Butter
Brush the tops of the folded tortillas with the remaining melted butter. This step helps create a golden-brown and crispy exterior while adding rich flavor.
5. Bake the Quesadillas
Place the baking sheet in the preheated oven and bake for 10 minutes. Remove the tray from the oven and carefully flip each quesadilla over using a spatula. Return to the oven and bake for another 10 minutes or until the tortillas are golden brown and crispy.
6. Serve and Enjoy
Remove the quesadillas from the oven and let them cool slightly before slicing. Cut each quesadilla into halves or quarters and serve with your favorite dips and sides.
Beginner Tips and Notes
How to Tell If the Chicken is Cooked
If cooking raw chicken for this recipe, ensure that it reaches an internal temperature of 165°F. The meat should be white throughout, with no pink in the center. If using a rotisserie chicken, remove the skin and shred the meat for a quick and flavorful option.
How to Prevent Soggy Quesadillas
To keep your quesadillas crispy, avoid overfilling them. Too much filling can cause moisture buildup, making the tortillas soft instead of crispy. Baking at a high temperature also ensures a crispy texture.
How to Flip the Quesadillas Without Messing Them Up
Use a wide spatula to carefully flip the quesadillas halfway through baking. If you find that the tortillas are sticking, allow them to cook for an additional minute before attempting to flip.
How to Reheat Leftovers
For best results, reheat leftover quesadillas in the oven or a toaster oven at 375°F for about 5 minutes. This helps them retain their crispiness. Avoid microwaving, as it can make the tortillas soft.

Serving Suggestions
Quesadillas pair well with a variety of side dishes and toppings that enhance their flavor.
- Dips: Serve with salsa, guacamole, or a side of sour cream for dipping.
- Rice and Beans: A side of Mexican rice or black beans makes this meal more filling.
- Salad: A simple salad with lettuce, tomatoes, and a light vinaigrette complements the richness of the cheese and chicken.
- Roasted Vegetables: Roasted bell peppers, zucchini, or onions add a delicious contrast to the cheesy filling.
Storage and Meal Prep Tips
Quesadillas can be made ahead of time and stored in the refrigerator for easy meals throughout the week.
Refrigeration
Store leftover quesadillas in an airtight container in the refrigerator for up to three days. To maintain crispiness, store them in a single layer or place parchment paper between layers to prevent them from sticking together.
Freezing
To freeze quesadillas, assemble them as instructed but do not bake them. Wrap each quesadilla individually in plastic wrap and place them in a freezer-safe bag. When ready to eat, bake directly from frozen at 400°F for about 20 minutes.
Making Quesadillas in Advance
For easy meal prep, cook and shred the chicken ahead of time. Store it in the refrigerator until ready to use. You can also mix the filling in advance and store it for up to two days. This allows you to assemble and bake quesadillas quickly when needed.
Conclusion
Baked chicken and cheese quesadillas are a simple yet satisfying dish that anyone can master. By following these step-by-step instructions, you can achieve crispy, golden-brown quesadillas with a creamy and flavorful filling. This recipe is perfect for beginners because it is easy to prepare, does not require advanced techniques, and is highly customizable.
Whether making these quesadillas for a family meal, a casual snack, or a game-day appetizer, they are sure to be a crowd-pleaser. The versatility of the ingredients allows you to experiment with different flavors and textures, making this recipe a staple in any kitchen.
Try this recipe today and experience the deliciousness of homemade quesadillas. If you have any questions or want to share your experience, leave a comment. Happy cooking!