The Ultimate Guide to Making KFC Potato Wedges (Copycat Recipe)
There’s something undeniably nostalgic about biting into a crispy, golden potato wedge, seasoned just right and fluffy on the inside. KFC’s potato wedges are iconic for this very reason, and today, we’re diving into how to recreate this classic side dish in your own kitchen.
PrintThe Ultimate Guide to Making KFC Potato Wedges (Copycat Recipe)
Get ready to recreate the magic of KFC Potato Wedges in your own kitchen! 🥔🔥 These crispy, golden wedges are seasoned to perfection and taste just like the ones you love—maybe even better! 😍 With this easy copycat recipe, you’ll be serving up the ultimate comfort food in no time. Pair with ketchup, ranch, or your favorite dip, and you’ve got a snack that’s pure joy in every bite. 🍟✨
#PotatoWedgeHeaven 🥔💫 #KFCAtHome 🏡 #SnackGoals 🍟 #CrispyAndGolden 🌟 #EasyRecipeSuccess 👩🍳 #FastFoodFix 🔥 #HomemadeHappiness 💖 #FlavorExplosion 🧂 #ComfortFoodLove 🍴 #FoodieInspo 😋
- Prep Time: 15 minutes
- Cook Time: 20 minutes
- Total Time: 35 minutes
- Yield: 8 servings 1x
Ingredients
- 1 cup milk
- 1 egg
- 1 cup flour
- 2 tablespoons seasoned salt
- 1 teaspoon ground black pepper
- 1/4 teaspoon paprika
- 1/2 teaspoon garlic powder
- 5 large russet potatoes
- Shortening for frying (or canola oil)
Instructions
Step 1: Prepare the Coating
- Set up two bowls. In the first bowl, whisk together the milk and egg until well combined.
- In the second bowl, mix the flour, seasoned salt, black pepper, paprika, and garlic powder. Stir until evenly distributed.
Step 2: Heat the Oil
- Pour shortening or canola oil into a large, heavy-bottomed pot until it reaches about 3 inches deep. Heat the oil to 375°F. Use a thermometer to monitor the temperature—it’s crucial for even frying.
Step 3: Coat the Potatoes
- Working in small batches, remove the potato wedges from the milk mixture using a slotted spoon or tongs. Allow any excess liquid to drip off.
- Toss the wedges in the seasoned flour mixture until thoroughly coated. Shake off excess flour.
Step 4: First Fry
- Carefully lower the coated potato wedges into the hot oil. Fry them in batches for 3-4 minutes, ensuring they don’t overcrowd the pot. At this stage, the wedges will cook through but won’t achieve their final crispiness.
- Use a slotted skimmer to remove the wedges and place them on a wire rack or paper towel-lined plate to drain.
Step 5: Second Fry
- Once all the wedges have been fried once, increase the heat slightly to maintain the oil temperature at 375°F. Fry the wedges a second time for 4-6 minutes or until they’re golden brown and crispy.
- Drain the wedges again and sprinkle with a pinch of extra seasoned salt while they’re still hot for maximum flavor.
Notes
- Temperature Control: Keep an eye on the oil temperature. If it drops too low, the wedges will absorb too much oil and become greasy. If it’s too high, they may burn before cooking through.
- Batch Frying: Avoid overcrowding the pot, as it can lower the oil temperature and lead to uneven cooking. Fry in small batches for best results.
- Troubleshooting Texture: If your wedges aren’t crispy enough, they may need a longer second fry. Alternatively, ensure they’re sliced thinly enough—thicker wedges take longer to cook through.
- Testing for Doneness: After the first fry, pierce a wedge with a fork to check if it’s tender. This ensures the second fry focuses solely on crisping.
- Oil Choice: While shortening provides a classic flavor, canola oil is a healthier, readily available alternative.
I still remember the first time I tried these wedges as a kid. The crunch was so satisfying, and the fluffy potato interior was pure comfort. When I realized I could make them at home, I was thrilled—and now, I want to help you experience the same joy. This recipe is perfect for beginners, thanks to its simple ingredients and straightforward steps. Plus, it’s incredibly versatile: you can pair these wedges with almost any meal or serve them as a crowd-pleasing appetizer.
Why is this recipe beginner-friendly? For one, it doesn’t require any fancy equipment—just a heavy-bottomed pot or deep fryer, basic kitchen tools, and some pantry staples. Secondly, the process of double-frying ensures foolproof crispiness, even if you’re new to frying. And finally, these wedges are made with russet potatoes, a variety that’s easy to work with and yields consistently great results. Let’s dive into the ingredients and preparation!
Ingredients and Preparation
Before we begin, gather the following ingredients:
Ingredients
- 1 cup milk
- 1 egg
- 1 cup flour
- 2 tablespoons seasoned salt
- 1 teaspoon ground black pepper
- 1/4 teaspoon paprika
- 1/2 teaspoon garlic powder
- 5 large russet potatoes
- Shortening for frying (or canola oil)
Why These Ingredients Work
- Milk and egg: This mixture creates a light, sticky coating for the potato wedges, allowing the seasoned flour to adhere beautifully.
- Seasoned flour blend: The combination of seasoned salt, pepper, paprika, and garlic powder mirrors the classic KFC flavor profile, delivering that familiar, irresistible taste.
- Russet potatoes: Their high starch content and low moisture make them ideal for frying, yielding a crispy exterior and tender interior.
- Shortening or canola oil: These fats have high smoke points, ensuring safe and effective frying.
Preparation Steps
- Scrub and Slice: Start by scrubbing the russet potatoes thoroughly to remove dirt. Keep the skins on for added texture and flavor. Slice each potato into wedges about 1/4 inch to 1/2 inch thick. This size ensures the perfect balance between a crispy exterior and a fluffy interior.
- Soak the Wedges: Once sliced, let the potatoes soak in the milk and egg mixture. This step enhances the flavor and allows the coating to stick better.
Step-by-Step Instructions
Cooking can be intimidating for beginners, but breaking the process into manageable steps makes it easier. Here’s how to nail this recipe:
Step 1: Prepare the Coating
- Set up two bowls. In the first bowl, whisk together the milk and egg until well combined.
- In the second bowl, mix the flour, seasoned salt, black pepper, paprika, and garlic powder. Stir until evenly distributed.
Step 2: Heat the Oil
- Pour shortening or canola oil into a large, heavy-bottomed pot until it reaches about 3 inches deep. Heat the oil to 375°F. Use a thermometer to monitor the temperature—it’s crucial for even frying.
Step 3: Coat the Potatoes
- Working in small batches, remove the potato wedges from the milk mixture using a slotted spoon or tongs. Allow any excess liquid to drip off.
- Toss the wedges in the seasoned flour mixture until thoroughly coated. Shake off excess flour.
Step 4: First Fry
- Carefully lower the coated potato wedges into the hot oil. Fry them in batches for 3-4 minutes, ensuring they don’t overcrowd the pot. At this stage, the wedges will cook through but won’t achieve their final crispiness.
- Use a slotted skimmer to remove the wedges and place them on a wire rack or paper towel-lined plate to drain.
Step 5: Second Fry
- Once all the wedges have been fried once, increase the heat slightly to maintain the oil temperature at 375°F. Fry the wedges a second time for 4-6 minutes or until they’re golden brown and crispy.
- Drain the wedges again and sprinkle with a pinch of extra seasoned salt while they’re still hot for maximum flavor.
Beginner Tips and Notes
Frying can be tricky, but these tips will help you avoid common pitfalls:
- Temperature Control: Keep an eye on the oil temperature. If it drops too low, the wedges will absorb too much oil and become greasy. If it’s too high, they may burn before cooking through.
- Batch Frying: Avoid overcrowding the pot, as it can lower the oil temperature and lead to uneven cooking. Fry in small batches for best results.
- Troubleshooting Texture: If your wedges aren’t crispy enough, they may need a longer second fry. Alternatively, ensure they’re sliced thinly enough—thicker wedges take longer to cook through.
- Testing for Doneness: After the first fry, pierce a wedge with a fork to check if it’s tender. This ensures the second fry focuses solely on crisping.
- Oil Choice: While shortening provides a classic flavor, canola oil is a healthier, readily available alternative.
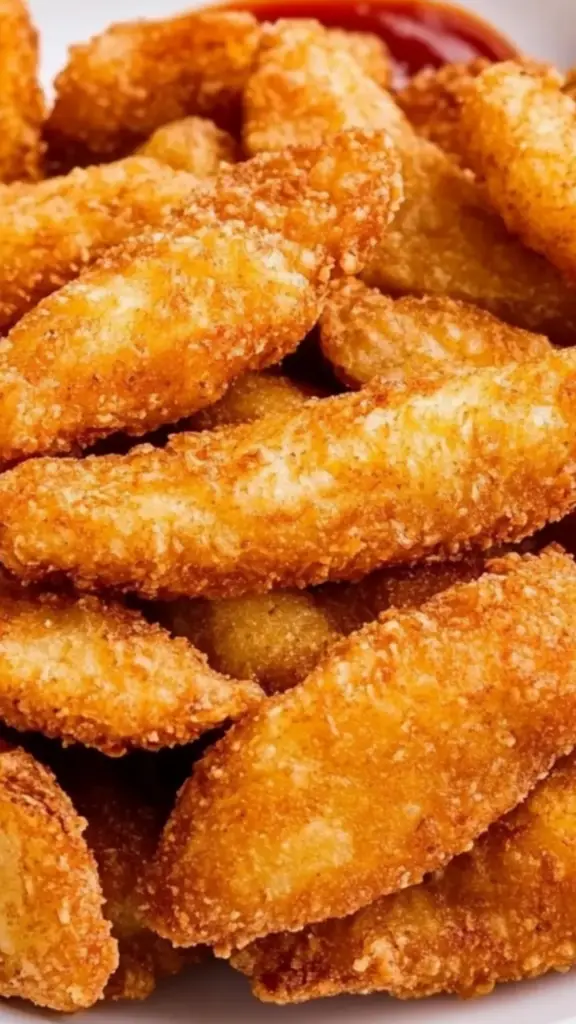
Serving Suggestions
These KFC-inspired potato wedges are incredibly versatile. Here are a few ideas to elevate your meal:
- Dipping Sauces: Serve with ketchup, ranch dressing, or a homemade garlic aioli for extra flavor. For a spicy kick, try Sriracha mayo or a chipotle dip.
- Main Dishes: Pair the wedges with crispy fried chicken, grilled steak, or even a hearty beef burger. Their bold seasoning complements a variety of proteins.
- Loaded Wedges: Turn the wedges into a meal by topping them with melted cheese, crumbled beef or chicken, sour cream, and chopped green onions.
- Salad Pairing: Balance the richness of the wedges with a fresh side salad. A tangy vinaigrette works wonders in cutting through the heaviness.
Leftover Tips
- Storage: Store leftover wedges in an airtight container in the refrigerator for up to 3 days.
- Reheating: Reheat in an oven at 375°F for 10-12 minutes to restore crispiness. Avoid microwaving, as it can make them soggy.
Conclusion
Recreating KFC potato wedges at home is not only possible but also incredibly rewarding. This recipe is perfect for beginners, thanks to its straightforward steps and accessible ingredients. The double-frying technique ensures perfectly crispy, golden wedges every time, while the seasoned coating delivers that familiar KFC flavor.
So, what are you waiting for? Give this recipe a try and treat yourself to a homemade version of a fast-food classic. Don’t forget to share your experience in the comments below—whether you added your own twist or stuck to the original, I’d love to hear how it turned out! Happy cooking!
